

It may not come as a surprise that owning 11 cars and having worked on cars for others has given me a broad education in the world of automotive engineering. While I’m not an engineer myself, I have had the opportunity to closely examine the decision-making processes of the Big Three and beyond as I learn to live with the compromises they had to make, and when those are compounded with time and mechanics who make questionable decisions themselves, I almost always learn something (even if that lesson is that I chose a stupid hobby). One of those things I’ve learned is this: All old cars leak. Some leak worse than others, but unless you’re one of those guys who pulls the engine and tears it down to the block to fix a dime-sized drip in the driveway (and more power to you), any car built before the 1980s has a propensity to blemish your new seal coat. The second thing I’ve learned on this particular project is that the intake manifold on a Ford FE big block weighs about 75 pounds, which is a lot of weight to lift from an engine while it’s still sitting in an engine compartment. So what’s the best plan of action? To save my back and avoid hauling the engine hoist up from the basement, I went to the experts.

When I bought my ’63 T-Bird in the fall of 2018, it was a part of an estate. The late gentleman who owned it had recently had the engine rebuilt by a “T-Bird expert,” and my borescope showed that the cylinders were indeed very freshly bored; it couldn’t have had more than 50 miles on it. In essence, I broke it in on the 125-odd-mile drive home. The odometer read about 52,500 miles (almost certainly 152,500 in reality). Over time, I started to question the expertise of said T-Bird expert. The engine leaked quite a bit of oil from various places, and the oil pump driveshaft was installed upside down (I still haven’t fixed that yet), a common mistake that should never, never, never happen if a builder just put a second of thought into it.
Ford FEs are definitely leakers. The main culprits seem to be the intake manifold gaskets (especially the oil seals front and rear), valve cover gaskets, and the rear main seal, and mine was probably leaking from all three. Because this is my first FE, I did plenty of research on how to best seal the first two. There’s an excellent FE forum whose members include professional engine builders who specialize in FEs, so I poked around there and determined my best course of action to not only remove the intake manifold in the car but also seal the leaking intake manifold and valve cover gaskets.

This is one of the reasons why the valve cover gaskets leak. For some reason, the FE’s intake manifold extends into the rocker box, meaning that you have to take out all the pushrods (and thus both rocker arm shafts) to remove it. Plus, the very sharp and hard intake manifold gasket stands proud of the valve cover sealing surface, which creates an excellent source of leaks front and rear. I sanded/ground it down after installing the new intake gaskets to try to eliminate that source of leaks. I use cork gaskets with wheel bearing grease on both sides for easy removal later.

So, how do you get that big heavy thing off the car? I relied on the advice of some old-time line mechanics; they always removed the hood, stood on Ford’s prodigious spring towers (when applicable), and lifted it straight off from above. That sounded easy enough, so I called my dad down to help me remove the hood. Then, I removed the carburetor and bolted my engine lift plate to the carburetor pad to act as a handle, put on a pair of gloves, and lifted with my legs and not with my back. I wish I would have asked Dad to take a picture, because it must have been hilarious. Installing the manifold is a reversal of the process, but you have the water pump bypass hose to deal with. It is a rubber hose that has to fit over the long metal nipple protruding from the water pump, and when installed, there is about a half-inch gap between that nipple and the one on the manifold. Luckily, I had replaced that hose the year before and used a hacksaw to shorten the nipple so I could replace the hose in situ. Therefore, I could worry about that later.

But how do you keep the intake manifold from leaking? Fords use cork gaskets on the front and rear china walls of the block to seal oil from escaping the lifter valley; that’s fine, but FEs have a propensity to leak from the driver’s side rear for some reason. One of the very well-known FE guys had a recommended method for sealing intakes that I decided to use. First, he said that early FEs (my 390 is from a ’61 Ford) had a pin sticking up from the block to center the manifold. That worked when the engine was new, but after a cylinder head milling or two, it positions the intake incorrectly (which is also why my distributor gasket was leaking). He suggested pulling it and filling it with RTV. I don’t have a pin puller and I didn’t feel like drilling it out, so I just cut it off flush. After I dropped the manifold on, I temporarily installed the distributor to center the manifold around it before torquing the bolts.
The FE builder also suggested tossing the cork seals and using RTV, a common hack for sealing almost any V8. By following those directions and letting the RTV set up for 24 hours, you should have a leak-free FE, at least from the intake manifold.

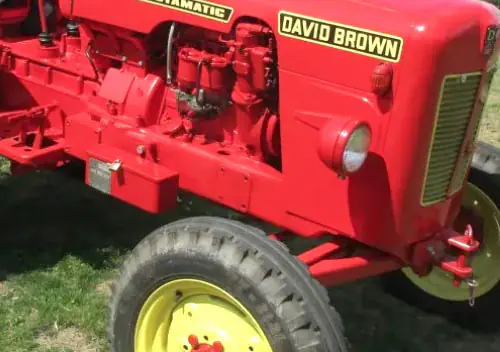
This is where I got greedy. I don’t like tearing apart working engines because, like anyone, I’m inclined to inspect things “while I’m in there.” Remember how I mentioned that the engine barely had 50 miles on it when I bought it? Well, I’m not sure it was broken in properly. Four lifters looked like image “B” in the 1952 Buick service manual pictured above. If you’ve been around old engines lately, you probably know that new flat-tappet camshafts are failing at an alarming rate. People blame motor oil for not having enough ZDDP (Zinc-Phosphorous-Chemistry I don’t have enough time in my life to research), but many builders know that it’s often poor materials and sloppy machining of the cam, lifters, or both.

I installed the driver’s side rocker shaft and pushrods and rotated the engine to see if those four lifters were spinning in their bores, and sure enough, they were not (the rest of them were). Of course, I could have yanked the cam out immediately and installed a new one, but I followed some expert advice from two places. The first was Derek from Vice Grip Garage, a funny YouTube mechanic and general character that I enjoy watching: “We’ll just pretend we didn’t see that.” The second were Buick engineers, a group of people I trust because I love Buicks. You may have noticed in the service manual above that picture “B” was acceptable (and caused by manufacturing tolerances not allowing the lifter to spin), that the lifter should not be replaced, and that their experience showed that it would not present a problem for the life of the engine. My engine had 7,000 miles on it as of last summer when I did this job, and I’ve been inside enough engines to have some intuition about these things. Maybe it will eat a cam somewhere down the line, but I don’t think it will. If it does, well, I’ll be tearing apart an FE. You just have to roll with the punches when you’re working on old junk.

I still remember my dad looking at me, wondering if he was going to have to help me pull a 390 out of an engine compartment that day, but I buttoned everything up and have been driving it for another year. Is it leak free? Nope. I think the builder screwed up the rear main seal. But it’s not that bad—it leaves about a dime-sized drop on the driveway every once in a while. Sometimes you just can’t win.
Links for further reading:
1963 Ford Thunderbird–A 19-Year-Old Me’s Wish Fulfilled (by me)
1963 Ford Thunderbird – No Pain, No Gain (by me)
1963 Ford Thunderbird – The Two-Year Rule (by me)
1963 Ford Thunderbird – The Cut And Try Method (by me)
1963 Ford Thunderbird – Honoring FoMoCo And Buying Trouble In Return (by me)
1963 Ford Thunderbird – “On Duties” (And The New Parts Blues) by me


Engine hoist is the only way to do a FE intake in my book. I’ve done it other ways but once I said screw it and pulled out the hoist I’d never do it any other way. No need to remove the hood and the bypass hose is easy to install that way.
Additionally I’d use the rubber valve cover gaskets if they are still available along with a dab of silicone at the intake gasket.
One of the reasons I’ve heard for the intake forming part of the head is weight savings, not in normal passenger car use but for the performance versions where an aluminum intake manifold was used. More intake and less head meant more aluminum replacing cast iron and a greater weight savings.
As far as the lifters go, the reason the lifters aren’t rotating has nothing to do with improper break in/lack of ZDDP. It is all about poor manufacturing of the cam and/or lifters, they are “flat”. A lifter should have a slightly convex face. The lobe should have some taper, if you were to put a straight edge across the face of the lobe it should not be perfectly parallel with the cam centerline. It is the taper of the lobe and convex lifter that ensures the contact point is not in the center of the lifter bore. It is that off center contact point that causes the lifter to rotate in its bore. The more important part is that helps draw oil in between the contact points and maintain the oil film.
I wish I could have seen the original lifters; the old cam was in the trunk of the car when I bought it. I do know this: the next time I have to replace a cam and lifters, I’ll probably send whatever’s in there out to someone like Oregon Cams or Delta Cams to be reground rather than buying a new one.
The cork gaskets are working fine for me so far, no appreciable leaks that I have noticed. I always straighten the flanges of the valve covers as much as I can though. For a lot of the engines I deal with, the rubber ones aren’t readily available anymore, although I love the silicone gaskets I’m using on my Mustang’s 289.
I can vouch for Delta well at least back in the day, haven’t done a cam in ages at this point, but they used to be my (and most people in W. WA) go to for OE replacement grinds. They used to offer a few performance grinds too, no idea about their current offerings or quality.
The crankshaft may have a groove worn in it from the rear main seal, causing a leak. My Triumph TR6 had this. A Speedi Sleeve fixed the leak.
That’s always possible, Jim, but I think the main point for leaks on Ford FEs is at the side seals. Since the block is skirted, the cap has a seam at the block, and they used seals and “nails” to hold them tight. They’re apparently a bear to get right.
You seem to have all the right questions of which I have no answers, or I even know what questions to ask. I do have unfortunate experiences with rebuilt 390 engines, so if possible, please post your link to the FE Forum that you said was a good source. I need that forum.
I don’t know if you are a member of VTCI (Vintage Thunderbird Club International) as they have great T-Bird forums that have helped me out a number of times regarding technical issues. You will also find links for part vendors and sources for every type of T-Bird specific service manual. Get the manuals. You noted you have a 1961 engine and understand it was not unusual for minor changes between 1961 & 1963, 390s. Understand, I am not mechanically inclined but I like to know what might be the cause of an issue before I take it to my mechanic. So I consult a T-Bird specific forum.
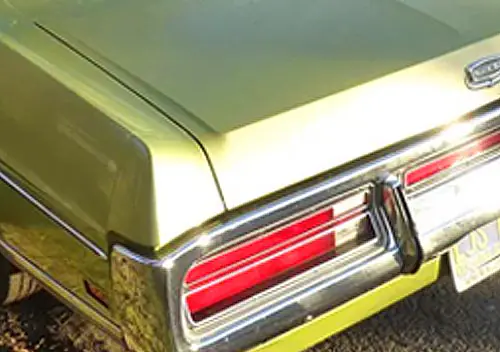
Your 1963 T-Bird looks great and one of my favorite colors. At my urging my parents bought a new 1963 T-Bird hardtop, Heritage Burgundy w/pearl beige interior, loaded with options. Early 1967, that Bird was given to me on my sweet 16th, the day I earned my drivers license. OMG, I loved that car and experienced how a new 1963 Bird should drive and feel. Just before I left for out of state college in 1969, Dad had the 390 engine rebuilt. Even though the car only had about 55k miles Dad wanted me to have relievable transportation while I was many states away from home. After the rebuild, the engine ran so smooth you didn’t even know it was running. I asked the mechanic about the break-in, followed the instructions, but after one round-trip from college the car just felt sluggish. Where was that fast, smooth acceleration? I came home for X-mass, Dad decided to drive my Bird for a week, unfortunately he wrecked my beautiful 1963, so he gave me his 1966 T-Bird Town Landau, and back to college I went. Only a few months later, back home for Spring Break, Dad borrowed my 1966, and wrecked that one as well. So I did not have a good experience with the rebuilt 390, in my 1963 Bird.
Many decades later, and two mid-life crises, I bought a 1966 T-Bird convertible, from a nationally known classic car dealership and had it shipped to me in Canada where I was living at the time. They say, buy the best you can afford. This was in 2014, my 1966 had been “restored” in 2000, and only had about 1000 miles on a rebuilt 390 and transmission. Lots of pictures of the car stripped down during the “restoration process”. After a month or so of negotiations, I paid about $2000 more then I was comfortable with, but heck it was restored and all those pictures of the process, what could go wrong.
I will tell you what can go wrong. I still remember what a new 1966 T-Bird with a 390 drove like ( now @ 315 hp). This engine rebuild with only 1000 miles was Sluggish. I have lost track how many times I have had the car in multiple so-called ‘restoration shops’ in two countries. There is always something to fix, The time and money I have spent on fixing fluid leaks. I would be happy with a dime size leak, but my leaks look like you scattered a pocket of coins on the floor.
Just got my beloved 1966 convertible back last week, another $600 repair. Coming back from a cars & coffee my 1966 had that dreaded whine from the power steering. Must add fluid. Check my manuals, check You Tube, poor in the correct fluid in the correct place, fluid went straight to the floor (another garage floor cleanup). Not too difficult as I learned years ago to park my old classic car on cheap plastic sheeting bought at Home Depot.
I am a member of AACA and think its time I post on their Forum help finding a local shop to once again rebuild my 1966, 390. Good luck with your 1963, don’t hurt yourself.
Hey Alfred,
I frequently check out the AACA forums; there are a lot of smart people on there who are willing to help. As with all forums, however, it’s important to be ready for a barrage of information that doesn’t always agree. It’s hard to filter out the noise, and there are sometimes people who overestimate the importance of the situation. Because of all this, I rarely ask questions on any forum, but rather use the search to survey the various methods of attacking a problem before I start. I’m not a member of the VTCI club, but I do check out their forum occasionally, but it’s less active than the AACA forums. On the other hand, the people there are very specialized in Thunderbirds, obviously, so you’ll sometimes get more specific information. Sometimes you won’t get a reply at all.
And I always buy all the factory service manuals for everything I own; it’s just about the first thing I do. Oh, and I linked the FE forum in the text.
Regarding your problems, it sounds like you have a power steering leak and an engine that’s poorly tuned. The leak could be coming from the pump itself (easy to reseal), a pressure hose or return hose, or the box itself.
Don’t assume your engine needs a rebuild because it’s sluggish. It might need to have someone set the timing (initial and total) correctly, and it’s possible that the secondaries in the carburetor aren’t opening, especially if it’s an Autolite 4100, which was standard from the factory. 4100s have a secondary diaphragm that is often torn, and you’ll be running on a two barrel at that point. These are not fast cars on the best of days, but with an incorrect mechanical advance curve and inoperable secondaries, they’re pigs.
As Scoutdude says, a hoist is the best way to do this job. That’s not always an option though, and the last one I did was in a 1968 Mustang. It was a 2 man job, using a short chain over a 2×4 on edge. I cut a notch in the 2×4 so the chain wouldn’t slip. Of course we removed the hood first. One man on each side and up and out the front it went. It was a tricky operation but it worked. The replacement aluminum manifold was a lot easier to handle!
I love being one of the guys standing around watching, which you so kindly permit by writing about your travails. I find that the older I get, the more forgiving I become towards an old car’s creaks, leaks and such. Now I know that an intake on a 390 is a job to avoid.
Ha ha, it really wasn’t that bad, JP. I can’t remember how long the car was apart, but it was no more than two days.
Aaron, thanks for this story, allowing us to watch from the sidelines, so to speak. I’m glad I’m wasn’t there to step forward and add muscle – that manifold weight is horrific. 75 pounds – that’s like about a bag of wheat (a weight I’m all too familiar with). But then I guess it’s about a third of what would normally be the cylinder head, so…
Ford did some strange things with their early overhead V8s, but that manifold/head split pretty much takes the cake. Having to dismantle half the valve train to pull the manifold – what were they thinking?
No problem, Peter. There’s always a certain amount of risk of embarrassment when you put your stuff out there for people to see, warts and all, but I have fun talking about it.
“Four lifters looked like image “B” in the 1952 Buick service manual pictured above.”
My heart sank when I read that.
The first year of the Buick Nailhead V8 was 1953. The Nailhead is the only OHV V8 I’m aware of that does not deliberately spin the lifters by:
1. Machining the bottom of the lifter with a slight “crown”–convex, like the outside of a contact lens.
2. Machining a slight taper on the cam lobes, and
3. Offsetting the cam lobe from the lifter bore, so that the “high side” of the taper contacts the very-slightly-rounded lifter bottom “off-center” creating force that spins the lifter in use, as the cam lobe contacts the lifter. This lifter spinning also spins the pushrod, so it’s easy to mark the pushrods with a vertical paint-stripe, start the engine with the valve covers off–or with cutouts on spare valve covers–and observe the paint stripes rotating around and around as the pushrod spins at idle.
The Buick Nailhead does not use a crowned lifter, no taper on the cam lobe, and the lifter bores are not offset from the cam lobe. If a Nailhead lifter spins–it’s not impossible–but it’s also not intentional.
I bet the Nailhead non-lifter-spinning was carried-over from the Buick Straight-Eight. I don’t know this, but I suspect it.
Which means, YOUR CAM AND LIFTERS ARE JUNK. The FE engines–and any other OHV V8 EXCEPT the Buick Nailhead–should be spinning the lifters. If the lifters don’t spin…they won’t last.
Photo of “Treasure Yard” Pontiac valve covers with windows cut in them to observe the pushrod spin. Can be done with other engines–just grab some valve covers and hack away on the pushrod side.
I wrote out a reply and it disappeared!
I replaced the lifters (and left the factory cam) in my Buick straight-eight when I got it in 2005, and then when I had my machinist rebuild the engine, he reused all those lifters except one (which was starting to wipe out). The cam was still fine. None of the lifters or the original lifters looked like picture “B” in the shop manual, nor did any of the original lifters in my Nailhead Riviera (which are still in there with the factory cam after almost 120,000 miles), so I don’t know if the straight-eight lifters were designed to rotate or not.
Regarding the T-Bird’s lifters, they were still convex when I took them out, despite the dimple in them, but still, it’s not great. Regardless, they’re staying until I hear the dead miss. It’s got about 8,000 miles on the engine now, so we’ll see.
My FE intake manifold experience goes back to about 1987-ish.
I had a job with a school-bus contractor; one of the elderly busses was powered with a Ford FE (or the strongly-related FT) engine.
The intake had to come off to remove the cylinder heads, to verify valve sealing. I discovered that since the pushrods go through the intake manifold and not the cylinder heads, that I could not remove or reinstall a pushrod or two on the left rear of the engine because the brake booster was in the way. I had to remove the intake with a pushrod or two still in place in the manifold, and going back in, the same pushrod(s) had to be taped in place on the manifold as the manifold was set down on the cylinder heads.
The whole FE design, where the intake manifold extends under the valve covers–making a three-way oil sealing nightmare–was unwise. Of course, GM did the same stupid thing with the 60-degree “Chevy” V6 2.8L, 3.1L, and 3.4L.
Yeah, specially-engineered, hand-built versions of the FE won LeMans multiple times. But it was a crap engine for mass-production, day-to-day use–oil leaks, poor power-to-weight, poor production-line machining in “passenger car” trim.
I think that the engineers and designers of these old cars would be quite amazed by how long some owners now keep their vintage cars. Back in the ’50’s and ’60’s people would trade in their cars every two to three years. After 40-50 thousand miles they were due for a valve job, then by the time that the odometer approached 100,000 miles, the engine would need a complete overhaul. Only really poor folks would keep a car to 1000,000 miles or more, fixing whatever it needed. Back then cars were built to last the original owner only a bit longer than the warranty period, which was pretty short.
I am usually in favor of leaving my old cars alone unless they really need the repairs. Though I had to change out all the air springs on my Navigator before I sold it recently. I’m proud to say that I handled that job myself.
I think leaded gas and poor quality oil probably had a lot to do with that, Jose, but there is NO way the engineers or manufacturers intended for these things to be around 60-odd years later. I’d still rather use a slightly worn factory part than a new one though. 🙂
Too late for me to get involved this late at night after the weekend in Reno. I have already done a 390 in the F100 and some know about the 410 for the Parklane. The 390 has no leaks after15 years. I expect the 410 to be the same. My one advantage is that I had all NOS stock parts for the 410. Bearings, rings, gaskets, and lifters. I am awaiting my 410 block which needed to be line bored after I mounted the crank, put the caps on, and the crank wouldn’t turn. That will be in part 2 of the rebuild. Taking the hint above, from Schurkey, I know that all my pushrods and lifters turn. As for the intake, which I think is closer to 85 lbs., I once used a 7′ steel pole across the engine compartment so a person on each end could lift. Great for removing but placing is another story. One must place the intake very carefully and accurately as I use the cork end seals. Now I use the engine lift which I only have to roll from 8 feet away. Hate to tell you but I never trust someone telling me an engine was rebuilt. I need to see the receipts and who the builder is so I can actually visit their shop.
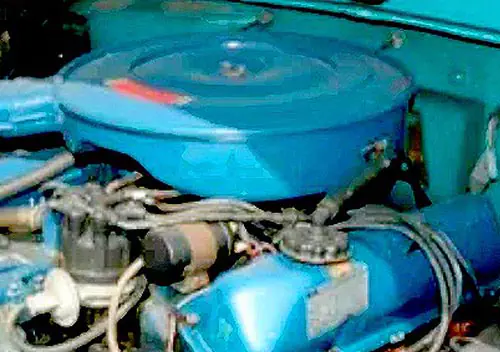
By the way the coil on top of the AC compressor?
I wouldn’t have anyone rebuild my engine for me these days, but I bought the car like that. If I could go back and not buy this car, I probably wouldn’t buy it, but you know how time travel works. 🙂
The coil is bolted to the A/C compressor; I’ve seen others like that, so I’d guess it was how the factory did it.
Apparently true. In 1965 Ford put the coil on the intake manifold instead. My 390 shows where that is.
Although I think you are missing a bracket as I don’t see it in your engine shot. The bracket is to keep the compressor from shaking. In my 67 and 68 Ford added a second bracket because of the compressor shaking.
Wow, that’s a piece of information about the FE that I didn’t know. With the crossed gaskets like that I would expect ALL of them to leak at the valve cover.
Thanks for bringing us along on another interesting repair.
You’re welcome – I think they normally do leak. 🙂
Thanx for this in depth article .
Many happy miles ahead for you I think .
-Nate
You’re welcome – I hope so!
Anyone considering old classic car ownership (at least an old Thunderbird) really needs to follow Aaron’s well-written and illustrated exploits with his car. The stories certainly scare the bejesus out of me and would think they’d dissuade many others of the notion, as well.
OTOH, I would imagine the level of self-satisfaction of solving well-known (but difficult to remedy) issues and keeping their beloved old ride in tip-top running order would be very high.
Ha ha, talking people out of the hobby is certainly not my intention! To enjoy old cars, you can buy a nice one that doesn’t need much, have a good mechanic (and pay accordingly), or learn how to do it yourself, and my hope is that some people see that it can be done by reading about my experiences. Of course, it’s taken years of immersing myself in the “might as well give it a try” mentality to get to a point where I’m not too scared to tackle things, and also to be able to judge what I can get away with leaving alone. (And I’m not always right!)
“The stories certainly scare the bejesus out of me and would think they’d dissuade many others of the notion, as well”
Oh, you can’t be that easy to scare? When it comes to cars from the 60s they are quite easy mechanically. Really, they are. Problem is the most of the so called projects left are bottom of the barrel grade 4- to grade 5 cars. One would be wise to avoid unless highly skilled. Decent ones, you can drive, Aaron65 car is one such car, is what you look for. Problem is price which are more often that not on the high side.
So if one is looking they should place priority on a good interior as they ARE expensive to recreate. Next the body to need as little work. Last, to me, is mechanicals as I can easily handle. However, some are taken with the idea of owning a cool car which is a recipe for heartache.
I read two different Ford Truck forums. One stand alone and one on Facebook. The standard forum is where the experience Ford guys are. They know all right down to individual part numbers. This is for experience Ford Truck collectors. The Facebook has many who thought a 66 F100 was cool yet know nothing about these trucks. The questions they ask show how little they know and how far they are in over their head. I can’t help them as there is too many.
So if you are capable, and Aaron seems quite able, then give it a go. You are right that the satisfaction in working one to very relaible status is very fullfiling.
Despite Fords’ many BETTER ideas on how to build this car that BITE the owner’s wallet, one “idea” they got completely correct was the appearance…after all these years the Bullet Bird still remains a drop dead (IMhO) GORGEOUS car that cannot be touched by anything currently in production.
I drove a new Bullet Bird, with its proud owner beside me, shortly after obtaining my first drivers license in Wisconsin. I remember the lil drive to this day. I really knew nothing about handling, brakes, performance, but I did know the gentleman had allowed a nervous 16 year old to DRIVE a beautiful nu THUNDERBIRD….OH WOW!!!! 🙂
At the time all I had ever driven was a 3 spd maunual Rambler American flathead 6 and my father’s el strippo ’60 Chevy Biscayne 4 dr, 3 on the tree 6. The dramatic difference between those two 4 wheel piles of sloth like automotive cheepne$$ (Jack Benny $pecial$!!) and the loaded, V8 Bullet Bird was truly phenominal!
DFO
Even the iron intake on the (relatively) tiny 302 small block is a heavy lump; I’ve never worked on an FE, but I can imagine how much of a hassle that intake has to be. I’d would have just replaced it with an Edelbrock Performer and been done with that hassle, then just keep the original stashed away in case a future buyer cares. You can probably take a hundred pounds off one of these engines with aluminum parts – intake, heads, water pump, etc.
As for the FE, it’s kind of archaic, but not a bad motor. I know a few people around here who still drive them in old trucks. I’ve done a lot of reading about Ford engines, and never heard a clear explanation for the intake and head configuration. It did carry on with Ford down the road: the 2.8 and 4.0 V6s do the same thing. Maybe there’s a stronger reason on a 60 degree V6, but on a V8 the leak potential and pushrod issue make you wonder. That element of the design seems like a step back from what Chevy was doing, but on the other hand, the engine was a step forward in having no siamesed ports and the distributor at the front where you can get to it. Of course, the small block would get rid of the intake under the valve cover thing, and eventually the 385-series big block would supplant the FE. The FE is a solid engine with a lot of pedigree, but it’s not one I’d go out of my way for.
I HATE it when I see RTV oozing out from everywhere. Sure sign of an amateur mechanic, and not a good one at that. But like more than a few things in life, in the right place, and used CORRECTLY, it’s invaluable. And it sounds like the intake here is one of those. I think I read, some years ago now, GM was actually gluing on valve covers with it? Never a fan of GM, but I bet they don’t have 3/4 of it oozing out. I just wonder how removable the VCs are?
Having done more than a few engines over the years, they all have their personalities. They all have quirks. Not so much the hard parts, bearings, rings, pistons etc, but the little stuff, like those valve covers. Until you do a couple, of that specific engine, with that specific quirk, you assume a normal gasket will work like it’s supposed to.
Totally agree on the RTV, but it’s a common thing to use it in place of the cork end seals on all kinds of engines. It’s kind of a personal preference, and some aluminum manifolds don’t even leave enough room for cork seals. Like anything else, clean it up after you’re done and it should look presentable. If I do use sealer, and you kind of have to with 60-year-old surfaces, I like good old Permatex #3, the brush-on aviation sealer. It’s a bit messy, but it cleans up easily and does a decent job. I use Permatex #2 for threads that are open to water or oil, although a lot of people use RTV.