

Last month, I shared my newest lifetime regret, the purchase of a mediocre 1967 Volvo 1800S, and as is always the case, it was not ready to act as a proper mode of conveyance should. Therefore, I’ve spent more time working on it than driving it, although I have now managed to put a couple hundred miles on the odometer; in fact, I drove it about 70 miles yesterday (as I write this), most of those at 70-75 miles per hour. I keep maintenance logs for my entire fleet of 11 cars on separate Google Docs, and I will use the Volvo’s as a springboard for a discussion about what I’ve accomplished so far. The logs themselves will be in italics, while additional commentary will be in plain text. I have redacted names of cities and businesses for privacy’s sake, but other than that, the maintenance log is in my own style of shorthand, typically only intended for my own future reference. This is what it’s like to own a neglected Volvo.

1967 Volvo 1800S Maintenance Log
6/24/25: Car arrived from…
The car showed up running but covered in lawn clippings on my preferred shipper’s single-car enclosed trailer.

6/25/25: 8,XXX, New Nexen tires from Discount, new battery from Walmart (Group 25). Added plastic bushing to carb linkage to take up some slack. Working at valve adjustment (they’re just noisy). Working on speedometer. Tightened up bumpers. Loosened rear brakes a notch or two (they are sticking). Added brake fluid to clutch reservoir. Mom and N cleaned the interior. I washed it.

7/7/25: As of right now, I replaced the overdrive relay with a dimmer relay from a Beetle and now the overdrive works.
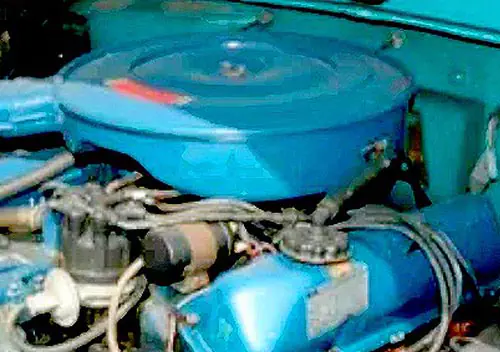
The 1800S needs its Laycock overdrive unit because it has a 4.56:1 axle ratio and tiny tires, meaning that at 75 miles per hour, the engine would be turning 4500 rpm without it. Considering the Volvo B18B has a recommended valve clearance of .020-.022, the noise generating capability of such a drive would be beyond the endurance of my patience. The overdrive unit is triggered using a momentary switch on the right side of the steering column, but this means that it must use a switching (or bistable) relay. The relay itself physically switches from one post to another and stays there when triggered by the switch. Unfortunately, like many wires and electrical components in the Volvo, mine was melted, and the part itself is a Lucas component that is discontinued. Used ones are expensive when you can find them, because they are also found in the headlight circuit of later Volvos and are therefore in demand. Since I’m trying to save money on this pretty but flawed little car, I found an alternative.

I also replaced a large section of the wire to the overdrive light on the dashboard. I also took the driveshaft over to…, as the u-joints you got from…were not right for the car. They replaced the front flange (at the overdrive unit) as it was wallowed out, and they replaced two of the three u-joints (that’s all they had in stock). They also installed the center bearing and bearing support. I tapped one of the transmission crossmember bolt holes and tightened it up, but it needs a new mount. I also got it some floor mats.
The Beetle used a bistable relay to switch between low beams and high beams, and those are easier to find and still reproduced (they cost about $25). Although I haven’t found a good way to screw the relay to the car yet (it’s not exactly priority number one), I stared at a few diagrams, plugged the wires into the locations where they seemed to make sense, turned the ignition on, shifted to fourth gear (there’s a switch on the shifter to provide continuity to overdrive in that gear alone), and listened for the click of the overdrive solenoid. It happened – Hallelujah. Freeway cruising speed is now 3400 rpm.

Summer 2025: Swapped exterior door locks because I broke the key off in the driver’s door, lubed lock mechanism and window tracks/gears. Swapped to a Bosch 009 distributor but swapped back to the old one, which is apparently out of a ‘74 or ‘75 Volvo 142 (or something like that). The 009 is just worn out (I think). The carbs have been synched, the valves adjusted 5 or 6 times to .020. The oil and filter have been changed (a bottle of Rislone added).
I mentioned in my first installment that I broke the key off in the driver’s door. The lock itself is a part of the door handle, and there are three studs with nuts attaching it to the car. One of them is so hard to reach that you will invent words that would make a good man cringe when trying to remove or install it. Once removed, it’s time to stare at the mechanism. I had it apart and together several times before I got the hang of how it worked, and now I have working locks.

Side note: Some Swedish parts bags have a moose on them.

I installed a new clutch master cylinder and had to bend a new line.
In the back of my mind, I knew I would have to do this job sooner than later; you may have noticed that I had to add fluid to the clutch master on the day it arrived at my house. The unfortunate part is that I couldn’t remove the hard line without damaging it, and I tried my best. The long flare nut was just not going to spin on the line, and I tried heat, penetrant, heat, penetrant…it just wanted to break that day. Luckily, I had a spool of brake line in the garage, and although my line won’t win any concours awards because those tight bends are difficult to make without kinking the line (I mean, look at the engine compartment, who cares?), I was able to use the original nuts (installed before I made the double-flare, of course).

It has new tie rods and ball joints, and I removed the steering wheel and moved it a notch to the right (it was a bit off).
This was a little sad. The ball joints and tie rods were all tight, but the boots were worn and they were probably original. Volvo switched to sealed joints (no grease fittings) right around the time the car was built, and I had troubling thoughts of those joints quietly rusting inside all that dried grease. My dad’s ’99 Mustang broke one of its sealed tie rods in his driveway; it had simply rusted apart, and it wasn’t even close to 60 years old like my Volvo is. He was on the expressway the day before, and that incident has haunted me since then, so out it all came.

Checked alignment. Fixed driver’s seat straps and added a stadium seat under the cushion. New speedometer cable. New fuel tank sending unit. New heater hoses. New antifreeze. Swapped rear drums side to side and scuffed them up (and adjusted them). New door mirrors (they are Lucas reproductions from…).
Fortunately, Volvo was very kind to mechanics. I’ve never had such an easy time replacing front suspension components; they are attached with bolts and nuts rather than rivets and use nylock nuts rather than cotter pins (I’d rather have the pins, personally). Setting the toe-in is also extremely easy; it’s adjusted at the center link, and there is no separate adjustment at each wheel, which is why I had to remove the wheel to straighten it, something you’d never do on a typical American car (you adjust the wheel using the individual tie rods).

8/19/25: The intake portion of the intake/exhaust manifold was cracked, so you veed it out and used some JB Weld, you dog. New Remflex gasket, and you tripled up the head pipe gasket because you didn’t realize that you have some Remflex material lying around.
There was a slight exhaust leak somewhere in the exhaust manifold area, so I decided to buy some excellent Remflex gaskets and do the whole job at once.

Unfortunately, the intake portion of the combination manifold was cracked. It’s near the heat crossover, but I did something I’m not always keen on doing: I veed out the crack using a Dremel tool and added JB Weld. Although I have stitched engine blocks before, JB Weld has its place; it’s been sealing a crack in one of my ’53 Buick’s intake manifold runners for 10 years or so.

Here’s the manifold, coated in graphite lubricant, and the carburetor heat shield painted with engine paint and ready to install.

I made a mistake here and made a gasket sandwich for the head pipe flange out of header gasket material. The Volvo was having none of it; it blew them out within two miles. Luckily, I had a flat sheet of Remflex material I had forgotten about…problem solved (although I did have to jack up the engine to remove the head pipe when the manifold was installed, a bit of a pain).

Here’s that beautiful, expensive, and totally-worth-it Remflex gasket. It’s made of graphite and is thick enough to seal up to 1/16″ gaps/pits/etc. It’s the only thing that’s reliably sealed my ’53 Buick’s long exhaust manifold (and yes, I tried the factory method of not using gaskets).

Here’s the (almost) final manifold installation. Now, I had to do something about the fuel line that broke at the rear carburetor.

New transmission mount. Stadium seat under passenger side cushion (and you bought some lawn chair straps for someday). New fuel line at rear carburetor.
Working on SU carburetors is a new experience for me, and while I like the challenge, I don’t like the comparative lack of parts availability and their expense. The line from the float bowl to the jet fell apart, and they are only available as an expensive unit (the jet is the tall brass thing; the metering needle enters it and provides the correct amount of fuel to the engine based on speed and load). Since I wanted to start the engine to make sure my exhaust leaks were repaired, I used a fuel-resistant O-ring, a piece of steel brake line, and some 1/4″ clear lawn mower fuel line as a temporary repair. Luckily, my new jets came in from eBay within a few days, because I wouldn’t trust my repair very far (although it didn’t leak during the few times I drove it). These are the new jets and fuel lines.

In case you were curious how the “choke” works on an SU: The choke cable activates an arm that physically pulls the jet off the needle, which supplies more fuel. Here is the jet in the fully choked position.

Here it is with the choke off, fully retracted (and a little blurry…sorry). By the way, the nut above the jet is how the idle fuel mix is adjusted; think of it as the idle needle on your standard carburetor (although that’s not a completely accurate comparison).
Here is a video of my exhaust check. So far, so good, but I had yet to blow out the gasket at the head pipe. (It’s not as clattery in person as it sounds on your phone, by the way, even though it’s far from quiet).

8/20/25: New transmission mount, but the transmission sure is leaky
8/28/25: Replaced red wire from fuse block in engine compartment to taillights and from taillight junction to license plate lamps, replaced passenger front parking light bulb and lubed socket, cleaned fuse block for lamps
It was around this time that I realized that the taillights decided to work intermittently. Some people shouldn’t be allowed to work on electrical equipment, because this was the harness that someone “designed” to operate the license plate lights. I have never seen so many scotch locks and burned wires on an old car in my life, but I’m working through the mess. I now have fully operational exterior lights, although it will need a new headlight switch ($$$) because the rheostat found the nearest exit and someone bypassed the dimmer with, you guessed it, scotch locks.
One thing that helps me on these electrical jobs is to buy a large, color-coded electrical schematic for my car from eBay. It’s laminated and just makes deciphering where everything runs that much easier than a black-and-white schematic from a faded or reproduced service manual.

If you were ever curious about what it’s like to make bad automotive decisions, I hope this piece has been instructive. What’s left to do? Well, the work on an old car is never done; it’s just that the jobs either become much more serious, or you get lucky and work your way through the minor quirks once the storm passes. In the case of the 1800, it has low(ish) oil pressure when warm (45 psi or so on the gauge at speed – it’s supposed to have 50-80). The carbs could stand to have the throttle shafts rebushed. The vent window and quarter window gaskets need replacing. I’d like a set of driver-quality chrome bumpers. And the list goes on…and on. Maybe next year, I’ll have the mental reserves for another update. But in the meantime, I have a Dynaflow to reseal in a ’53 Buick, a winter job if I ever saw one.

Epilogue: I couldn’t leave well enough alone. I used my borescope to inspect the cylinders, and although the engine has .020 over pistons (signifying a rebuild at one point), it’s clear that at one time the rings were rusted to the cylinder walls, especially on cylinder #2 (as evidenced by the lower cylinder pressure). All of these numbers are lower than Volvo specifies (170-200 psi), but that can be attributed to any number of things, such as a thicker head gasket than the factory installed. And pitted cylinder walls.

I also temporarily installed an auxiliary oil pressure gauge because I didn’t trust the Smiths unit, but it turns out that it was correct. Oil pressure specifications state that 50-85 psi at 2000 rpm is what you should be looking for; I have about 35 psi hot (at 2000 rpm). At startup, it’s 70 psi, and although it will climb to 45-50 psi at higher revs when it’s hot, it is clearly low. Therefore, I’m dealing with a worn engine, but I’m pretty good at nursing worn out engines for a long time; after all, I only drive these cars 500-1000 miles or so a year each. When I feel like there’s no putting it off any longer, I’ll hope I can find oversized pistons for a B18.

As I heard someone ask on Cold War Motors, a YouTube channel I watch, “Why are we wired this way?” Indeed, it’s past fighting.


AARON65, Excellent. Just excellent. Thanks so much.
Thank you!
Isn’t Rislone mostly kerosene? I used it once and it didn’t seem to hurt anything, but it didn’t help either (sticky hydraulic lifter).
No idea! It’s probably snake oil, but it’s quieted down a hydraulic lifter of two in the time I’ve used it, so it doesn’t probably doesn’t hurt anything.
Great post. I’m really glad that you’re keeping us in the loop about your efforts with this car. IMO, the Volvo offers just the right amount of quirky challenge combined with relative ease of work (e.g., your comment about the ease of replacing suspension components). For better or worse though, it may be a quirky challenge that just keeps on giving. At least until you eventually replace the entirety of the wiring.
I think you should meet this guy – https://www.hemmings.com/stories/in-our-garage-fixing-decades-of-automotive-wiring-hacks/ . If you haven’t already. His solution about eventually replacing the fuse box in his 1800 reminds me of your overdrive relay hack. They may be fascinating to look at, but those old GBC fuses are anathema to reliable motoring (at least in a 50+ year old car).
Anyway, love the tone of your piece and your style of journal entries. Hopefully you can keep it going.
Thanks Jeff. I will say that the Volvo is more demoralizing than most cars I’ve bought, but I’m not sure why; the Riviera was at least as bad. Maybe my absolute unwavering love for that car in particular clouded my reality.
Thank you . Love this content !
Thanks!
This is great stuff. You’re reminding me to treat my own old car better.
It can be hard to do everything properly and methodically when the list of needed repairs is so long.
It’s like life…one day at a time, one repair at a time (I keep trying to remind myself).
Fun read. We drove our B-18 122-S for over 10 years (1970 to 1981) from 38k miles to 220 k when it got totaled. Just use a slightly heavier oil like 10w40 and ignore the valve noise, they all have a bit of sewing machine noise in them, don’t set ’em too tight. To keep the carbs well synched a Uni-Syn is invaluable, leaky shafts will cause problems. Have fun, great car. We sat in a new ES in 1972 and dreamed of owning one, sadly it never happened.
That’s good to hear; I was considering doing something I NEVER do, which is switching to 20W-50 to see if it helps the oil pressure. I’ve read that the B-18 was a “tappety” engine, and it certainly is in my experience; it’s loud at speed inside the car, which is a little annoying. I’ve been setting the valves with a .020/.022 go, no-go feeler gauge, so they’re not too tight. And I do have a Uni-Syn.
The carb shafts are definitely loose; I’ve been ruminating on what to do about that.
EDIT : ATTENTION PAUL : THIS MESSAGE TOOK JUST UNDER FOUR MINUTES TO LOAD, WHAT’S WRONG ? .
At least it looks very pretty =8-) .
Those cube relays are a standard item and _very_ common on European and Japanese cars, some are rated up to 50 amperes and many have a different tang, one that has a 5MM hole in it very easy to mount using a screw the vehicle has or adding a tiny hole and sheet metal screw .
? Did the new U-Joints had Zerk fittings ? .
Whilst you had the ball joints out was the perfect time to check and adjust the center of the steering box, I am always surprised to discover some old untouched vehicle to have been driving for 50 + years with the steering box a few degrees off center, this affects the geometry of the entire steering .
IIRC Moss Motors in Goleta, Ca. has good prices on SU Carby parts .
? Did you adjust (balance) the carbys using a vacuum or air flow gauge or just your ears (“listen to the hiss”) .
FWIW, a noisy valve is a happy valve……
“Where you find a scotchlock, you’ll find a problem” .
The car is from Michigan, where’s the rust ? .
That ignition switch is sure to fail with all those keys hanging on it .
This to me is a nice old Volvo, not any sort of “mistake” .
-Nate
The comment I just posted below took exactly four seconds to load. Seems like maybe it’s on your end? Too many Scotch connectors in your device or internet?
Update: this comment took less than two seconds to load.
Nate, I have a UniSyn because I also own a Corvair. It only takes me a minute to get the SUs synched, but I’ll need to get the throttle shafts rebushed at some point. The car’s not from Michigan, but it still has a lot of fiberglass in it.
I used Moss to buy the exterior mirrors, so I can use them for buying SU stuff when I need to.
Those cube relays cost a dime a dozen from any cooperative junkyard. I harvested my own from cars abandoned in front of a local metal scrap facilty who refuses to sell parts (one of those too big to fail companies who don’t need extra profits?). As long as the minimum amperage is met, a Volvo won’t be able to know that its next relay was once in a Mitsubishi or in a BMW.
Scotchlocks to me are like waving a red cloth in front of a bull. Those are the first objects to get ripped out, when confronted.
The article’s author would do good, to keep those original tie rod ends and joints, because those deteriorated boots could get matched up with new ones from a differing brand
It will be 50 years in a few months since I bought my first car, a 1965 Volvo 122S. Only ten years old but the seat cushions were shot, the dash was cracked … and the valves clattered despite monthly adjustments; I synched the SU’s every month as well, tweaking the points gap every other month. I don’t miss that fettling but I do enjoy reading about it. Keep us updated on your progress.
It’s nice to hear about people who have had similar experiences with their Volvos; it makes me feel like I’m on the right path. Sometimes we try to fix problems that aren’t really problems.
I don’t know if you’ve read my sad tale of an 1800ES…
https://www.curbsideclassic.com/cars-of-a-lifetime/coal-1973-volvo-1800es-a-brief-fling-with-a-shooting-brake/
Sometimes rereading that story makes me sad, but sometimes I feel like I got lucky and dodged a bullet.
Ha…this is familiar, but I have nobody to blame but myself. Luckily, 1800 prices seem to be on the way up, so at least I bought something that’s appreciating.
So glad you’re back at CC sharing your challenges, travails and successes with this lovely car. (and your others). Your approach to fixing things is one that really resonates with me, being pragmatic, creative and choosing your battles. I’m so bored folks who just throw ridiculous amounts of money at their old cars by having all the work done by professionals. That’s not the CC way!
The wiring in my ’66 F100 is pretty dodgy, with plenty of those connectors and others. Keeping all the lights functioning has been a constant minor challenge, but I’m just not ready to undertake a full new wiring loom.
Looking forward the next update.
Thanks Paul! I’m lucky that my genetics and upbringing incline toward not fixing what isn’t broken. It took me a while to learn the difference between the two, but experience has helped. I tend to only rewire what’s needed, and I’m getting there…I think a new headlight switch will solve a lot of little problems.
Is it just me, or do most automotive bad decisions come with red paint? But even if this Volvo classifies as such, you have a way of salvaging things and making a car that provides more enjoyment than headache (even if only by a little).
I loved the journal. I wish I had done this down through the years. I look forward to more of your garage adventures.
I started keeping journals when I started having too many cars to keep track of by memory, which has been almost 20 years now. 🙂
They used to be on paper, but I converted them to digital a while back, and it’s the only way to go. I can update maintenance on my phone in the garage now.
Thanks Aaron, my deffered maintenance repairs are so similar, but my car is a Rootes effort, built under Chrysler ownership, build quality is fine all the doors swing shut and latch by themselves, but wiring all replaced with another loom I’d love a coloured laminated wiring chart I have a dirty faded b&w version, carb problems solved with new Chineseum Weber and NOS aftermarket manifold, exhaust leaks fabricated headers and 2 inch system, Overdrive on my car is mechanical I run a lower ratio sedan diff head and the larger diameter wagon rear wheels for a 3.67 final drive our speed limit is broken in 3rd quite easily Ive no idea what it does flat out, if I want to go fast I have a Citroen that can double our speed limit still accelerating. My car came with a lot of the parts required and a lot of parts I didnt want, usually I fix cars Cold war motors style harvesting from wrecks with zero budget but dont have room to store wrecks now or available free wrecks, most parts are a phone call away a new pinion seal took less than 24hrs to show up its fun and no there isnt a cure.
https://www.ebay.com/sch/i.html?_ssn=classiccarwiring&store_name=classiccarwiring&_oac=1&_trksid=p4429486.m3561.l161211
This is the eBay store I buy them from…
Well, the thing to remember is that it’s a beautiful car and hopefully that beauty will keep you from going too far down the demoralization road. I know that you have gobs of experience with old cars, but to me your update doesn’t sound so much like the chronicle of a bad decision as much as the description of what it takes to keep a 59 year old piece of machinery on the road.
I’ll add that your post takes care of several tales of woe and intrigue that I was going to write up about my ten-year-younger Swede. So now I can hold off on those (which is ok, since there’s a never ending river of woe and intrigue). But I’ll just say that a lot of the connection relates to the electrical system in the car…running from mundane stuff like lights to more complicated stuff like the fuel injection system. It’s a constant race between parts becoming unavailable and how long 50 year old stuff like those ice cube relays that -Nate mentions stay functional. I try to keep things original, but sometimes that’s not possible when something breaks that must be replaced (as opposed to when something breaks that isn’t absolutely essential. I have lots of those things too.).
I once spoke to a guy who collected old pinball machines and jukeboxes (of course), and his life was much like mine. Every day you patch something up knowing that eventually you won’t be able to that at all. But man, until then… The beauty of the machine counts for a lot.
By the way, I think your engine sounds fine. It’ll be interesting to know what slightly heavier oil does. Meanwhile, you’ve inspired me to go adjust my valves. That’s a good thing, right?
I try not to think about that, Jeff. Almost everything I own was long ago obsolete, and it’s already harder to get good parts than it used to be…but it’s worth it while it lasts.
So you now have 11 cars if I am correct if you haven’t sold one which you didn’t. You are like me in that regard. Almost thought I might get #12 which was a 1989 Ford Probe with 5 spd. Only the sellers last picture showed a big hole in the dash where the A/C vents were. In their place was a graphic equalizer and so I said no thanks not wasting my time driving 40 miles. Then seller, now scammer, sends a photo with the vents in place. Only the open hood is no longer white and the digital dash is now analog.
Still sitting on 11. My sister drove an ’89 Probe with the automatic and the base 2.2. It’s been almost 30 years, but I remember thinking that it felt quicker than a 110 horsepower should. Even today, the styling hasn’t held up too badly at all; I saw a GT for sale in southern Michigan a few years ago for a very reasonable price, but it was a lot too new for me.
I’ve always had a soft spot for older Volvos; my first new car was a ’66 122S and my second a ’71 145s. I drove many miles a year and towed a drift boat all over the Pac NW with a dog and tackle in back and a very understanding wife in front.
I recall doing a lot of the maintenance myself, but nothing on the scale of what you’re doing. Across the river in Portland, IPD was selling and installing performance parts for Volvos; I did some business with them and I see they’re still around.
I’m at the age and inclination where I can’t do what you’re doing. But I sure enjoy reading about it!
I haven’t tried IPD for parts yet, but I’ve had good luck with VP Autoparts and Classic Volvo Restoration in Sweden. I’ll have to give them a try sometime.
Very nice, always loved the 1800s. I admire your energy to keep 11 cars in some state of repair.
I had heard that vintage Volvos are a real challenge for parts, and I guess you’re finding that out too but you seem to have the creativity to keep the practical repairs going.
Well done!
…or updating with more modern systems whose bits interchange with those of other brands. All that needs to be done is to amputate that troublesome intake manifold from the exhaust and to make way for a brace, through replacing that generator witha long-overdue alternator:
https://historic-cars.cz/gb/1311-injection
Photos seem to not be able to get editted:
Upon acquiring a vintage car a lot of time is spent properly fixing the bodges done by the previous owners as well as catching up on deferred maintenance. I’m fixing a few things that need to be done on my ’46 Plymouth, which was restored around forty years ago. Low oil pressure is probably due to worn main, connecting rod, or cam bearings. Lot’s of times previous owners will have the block bored out, new pistons and valves resurfaced, but won’t replace the cam bearings in the block. My old ’66 F250 was like that. It had such low oil pressure that the warning light would go on at idle when hot! I replaced the oil pump with a new unit and switched to straight 60 weight oil. That worked pretty well and I drove the truck for several thousand miles over a few years. I drove it at a maximum of 60 mph. and never suffered an engine problem (failure) including a 200 mile trip to Santa Rosa to pick up a replacement engine. I bought a good used engine for it, but never installed it, and included it when I sold the truck. Good luck and good times with the Volvo, they are pretty cool cars.
I thought the same thing, Jose. I can’t imagine that someone would have the block bored and install .020 pistons without at least replacing the rod bearings, but that doesn’t mean that they replaced the mains or (even less likely) the cam bearings.
As a veteran of 25 years plus selling import car parts, let me off a suggestion. Rather than searching for B18 +.020 pistons, just get standard B20 pistons.. They are probably easier to find. Their use requires about a .20 (4.8mm) overbore. The B18 cylinder walls are thick enough to do it. It was a common modification 40 years ago. Depending on where you’d like your final compression radio to be, there are various rations thoughout the B20 variations. B20E is the highest, B20F is lower.
Search the Volvo forums for further information.
Your observation on the head gasket thickness could be correct. It wasn’t uncommon to use a thicker head gasket ( Volvo B20 Penta?) to reduce compression ratio. Some B20s ( my 1969) had a real issue with run on (dieseling) and knocking late 70’s and 80’s gasoline.
The engine’s already at .020, Bruce, and judging by the pits on the cylinder walls (especially #2), it would probably have to go to .060. Of course, the borescope makes everything look worse than it is. I found a set on one of the Volvo parts sites, but I’ll worry about that when the time comes. Thanks for the tip…although I’d sure have some explaining to do if I went into the machine shop asking for a .20 overbore.
Steel brake lines are mandated probably everywhere in the more civilized places on this planet, only for braking systems. This material is, however, overkill for clutch tubing applications.
Bending copper and aluminium tubing is easier and will never get subject to the pressures required for braking. Of course, copper will become brittle, when physically challenged to frequent bending and vibration. Therefore, it’s necessary to secure copper tubing to the vehicle’s body or chassis, in a manner to where its bondage is fully effective
You’re probably right, Sal, but it’s what I had lying around in the garage. 🙂
Agreed, this is great, Aaron. I too keep a record of what I’ve done on my trucks in weblog form, more for myself than for anyone else, and it helps me keep straight what I’ve done and how I did it.
My wiring nightmare involved buying an IH Travelall where some genius had used a pair of dikes to cut out the fuse panel instead of just disconnecting the leads. I had to source a replacement wiring harness (not as hard as you might think), pull the dash out, swap it in place, and then put it all back together. Minus some grounding issues, I’ve now got a working electrical system.
Oh, I love Travelalls. The worst part is that these are not complex electrical systems, but there are still a lot of wires in there, and so many people have messed with them at this point.