

The Lancer was being doted on in Northern Michigan, as much as it’s possible for a man with too many cars of his own (and a day job seeing to customers’ cars) to dote on mine for fun. He installed the Australian backglass venetian blind and de luxe trunk mat, shown in last week’s chapter.
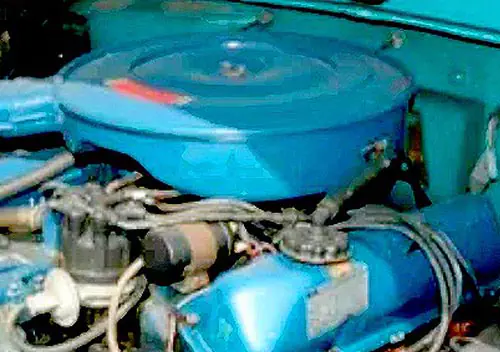
He tried some fun experiments in the engine bay. Find me another 1962 with colour-matched radiator hoses, I dare ya!


He repainted the black parts black, and wrapped the positive battery cable so it would be red as called for in Scripture.


He masked the grille and headlamp bezels (Chrysler said “doors”) and painted them à la ’62 Lancer GT. This came out great, and there were enough spare parts on the shelf that if it hadn’t…eh! It’d’ve been no big deal.


I visited and drove the car from time to time, and did my own doting. Here I am adjusting the valves (engine hot and running!) in 2002, before my beard even started thinking about going white:


The engine compartment never got fully primped and detailed, but there was a whole lot of good stuff in there. Here we see the aluminum block, the aluminum –Mopar Performance– Direct Connection 2-barrel intake manifold, the refinished heater box, the 2¼” exhaust headpipe attached to the new old stock factory exhaust manifold, the unnecessarily-large-gauge battery cable feeding the Australian starter motor, the dual master cylinder, and the evidence that this air cleaner didn’t quite clear the closed hood:

We swapped on an air conditioner compressor clutch with a heavy iron “inertia ring” (flywheel), which did smooth out that paint-shaker V2 compressor a bit:

I collected not one, not two, but three different Slant-6 triple-SU intake manifolds (Cain, Lynx, Warneford):


Think I had a twin-SU intake, too. We fantasised about various builds with them, but none of them ever went on the car.
When you have an old-old car, you wear out stuff most car owners never have to think about. There was a close call with the instrument panel faceplate, though I think that might’ve been back in Denver when the car was in daily service: the lower half of the faceplate was vacuum-metallised, along with the rims round the whole faceplate and each instrument. The clearcoat over the super-thin metal began to yellow and lift. I took the faceplate off and carefully chipped at the clearcoat with a pinkienail, and a big flake of it came off. I took the faceplate in the house and ran it under hot tapwater, and the rest of the clearcoat quickly and completely flew off with just light finger-rubbing. Miraculously, the super-delicate metal film stayed perfectly intact on the plastic faceplate; by rights it should’ve either floated off down the drain with the clearcoat or otherwise been marred, then I’d’ve had to send the whole thing in for re-metallisation by one of the specialty outfits advertising that service in Hemmings and the like. But this gossamer-thin aluminum was not going to stay shiny very long without a new topcoat applied quickly. I don’t recall what kind of clear paint I used, nor how I masked the black parts, but in the end the only difference was that all the metallised parts were shiny, instead of just the rims—the lower half of the faceplate originally had a matte clearcoat, as can be sorta-seen here (pic definitely taken in Denver):

In early 2005 I found that an outfit called Blue Star Spares in Australia (previously Chrysler Spares, until Chrysler cleared their throat at the owner about it) had a bunch of new reproduction parts for early Valiants, which have long been much more highly prized down there than up here. One item that caught my eye was new armrests. The armrests in my car had been growing a little dowdy—the vinyl had split on three of them, and all four were kinda wavy and warped. I ordered a pair of the new ones from Australia to see how they were, and they were quite good:


They were patterned on the ’63 armrest, with vertical lines in the embossed face, rounded contours in the grip area, and a sturdier grade of vinyl and thicker shape than the ’60-’62 items. Here’s a good pair of original armrests I pulled from a ’63 Dart at the yard in Denver in the mid ’90s (along with an extra-scarce ’63 aluminum 225):

The only major visible difference between the new armrests and the ’63 items was that the repros had a moulding seam line along the contour of the grip area on the armrest’s top surface. It was far more visible in these pics than in real life.
And here are some pics of the one unsplit original ’62 armrest, which really does look chintzy versus the subsequent-year item; a lot of bits and parts of Chrysler-built cars got a lot sturdier in ’63:


I was apprehensive about trying to get the new armrests to match the metallic green colour, but I took one of my original ’62 armrests to a reputable local auto body and paint supply store; they had a handheld computerised colour scanner, which they pressed against a cleaned part of the armrest. The scanner flashed and clicked five times. Ten minutes later, they handed me a custom-mixed aerosol can of plastic-and-vinyl paint formulated for adhesion and flex on parts like armrests (or radiator hoses, ahem). The cost was very reasonable.
Back at the house, I set up my painting surface, an upturned shipping box, and shot the repro armrests, starting with a few thin base coats which I allowed to flash off (begin to dry) for about four minutes each, then laid down a couple of heavier coats at ten-minute intervals. Sometimes my spray paintwork is a mess, but not this time. Here’s a shot in mid-job on the repro armrests:

I would learn a few minutes after this pic was taken that it’s best not to set even a touch-dry paint surface down atop oversprayed paint—it stuck, and I had to do a bit of touchup.
And here’s a shot in mid-job on the original ’63 amrests:

Defying gravity…? No, I just used one of the armrest attaching screws to thread the rest to my boxtop’s edge. Worked perfectly and allowed me to hit all the necessary surfaces without danger of sticking to the boxtop.
The match turned out great; I was not expecting the results to be this good (yes, I needed to clean the driver’s side door panel).


The extremely blue light of the sky coming from overhead, contrasting with the extremely yellow light reflecting off the fields behind me, made it difficult to show in photos just how good the colour match was. In person, it was basically impossible to tell these replacement armrests were anything but original equipment. The original ’63 armrests and the new repros matched each other nicely, too.


















I’m a bit sad to see the Lancer go. Great read, though.
It seems that stuffing a big cardboard box that has a structural integrity of Japanese lantern with bunch of parts isn’t such a good idea. I had the same misfortune putting together my personal belongings in a big box and shipping it from Denver to San Francisco. The box arrived so much banged up and heavily wrapped with sticky tape by UPS. Fortunately, none of my stuff was damaged or missing.
Lesson learnt: don’t assume the shipping companies would treat the large packages like they are national treasure. Better put them in the American Tourister luggage…just in case.
I bought an air conditioner weighing about 70 pounds a few months ago from Amazon (it was out of stock locally). The UPS guy brought it from the truck to the front porch by dumping it over and over (like rolling a ball, only a square ball). Seriously, they deliver stuff like that all day long and don’t have a hand truck in the delivery van?
I wonder if the YouTube video of a delivery guy doing just that is your A/C unit???
I think some shippers view stuff as a challenge. Around 2002 or so we shipped some flight cases full of rack mount servers to China for some training classes. Despite having a native Mandarin speaker confirm we had correctly written “this side up” they came back with footprints on the sides of the cases, several rack mount ears torn out of the server chassis and enough dented and twisted metal reinforcements that I spent an afternoon hammering things back into place. A subsequent redesign protected the contents a bit better but still looked trashed on the outside after any Chinese tour. Eventually they rigged up remote access so the machines stayed at home which saved a lot of aggro.
Wonderful Daniel, a fitting coda to this moving piece. Your Dad took a chance on your nutty idea, but he had faith in you and you delivered. That’s sure something to hang part of your identity on, not everyone can say that. Your Dad had faith in you and you delivered.
Speaking of identities, you’ve really given me some food for thought on the aging old car guy identity. I admit there are times I think “Am I enjoying this, or am I enjoying the echo of how much I used to enjoy this?”. Add that to the small back twinge that means “if you don’t stop what you’re doing right now you’re going to get the BIG back twinge and you’ll be out of action for a week” and I’m almost at the point you’re at. Or I should be at that point, or something.
There’s definitely something to be said for the Aussie appreciation of 4-door classics. My friend had a very nice 56 Chevy Bel Air that he couldn’t give away in North America, but it was happily sold and shipped to Australia, I guess they used to have a very hard stance on LHD cars but that has softened.
Thanks again for this great series.
“Am I enjoying this, or am I enjoying the echo of how much I used to enjoy this?”
This is a really great question to ask ourselves about many, many things in life.
Yes, so true! My variant of the question: “Is it a want-to or a have-to?”
I’ve never owned a classic car but still dream of doing so. But probably it’s not such a good idea at my age.
Then again, I have my 23-year-old Nissan Frontier, which I’ve owned since it was new, and I had my 1980 Volvo 242DL, which I kept until 2003. The Volvo did require frequent tinkering, but the Frontier just rolls on with hardly any issues.
For perspective, in 1970 when I graduated from high school, a 1947 model would have been 23 years old — lots of changes in THOSE 23 years.
Yes indeed.
I love it—I am not being sarcastic—when someone succinctly summarises something I’ve said. Perfect! It got to feeling like I wanted to want to putter around with the car.
Doug, thanks for this. Seems obvious when you say it out, but I hadn’t thought of it that way.
(apologies for belated reply)
It’s fascinating that someone is reproducing these old interior trim pieces which one would think were made from unobtanium. There can’t be much of a market for them.
I think someone once mentioned that the ideal 1st gen A-body would be a Lancer with 1962 Valiant taillights. That sounds accurate, to me.
Even so, to me, the Lancer was still the looker of the first A-bodies, and this has to be one of the most beautiful out there. Particularly nice is the Lancer ‘GT’ grille and headlight surround treatment. Maybe if this had been how the original 1960 Valiant had turned out, sales would have been better.
Sad to see it go but it looks like it got the good home it deserves, even if it’s now half a world away. Hopefully, the current owner has gotten an opportunity to read the CC series and can see how much effort and care was taken to keep this old Lancer in the best possible condition.
Well, repro parts come and go. Those particular armrests I think might no longer be available, but the guy who bought my car has talent not only for finding parts made of solid unobtainium (steering wheel hub clock optional in Canada, tachometer optional in Mexico…) but also for making needed parts. The additive manufacturing/3D-printing revolution is helping.
I don’t agree about the ’62 Valiant taillights being ideal; I like the ’60-’61 Valiant and ’61-’62 Lancer items better. But in my mind’s eye I can almost see ’62 Valiant stop-tail lights in red per stock with ’60-’61 Valiant or Lancer lights in amber as turn signals…almost.
I’ve (a few minutes ago) pointed the new owner at these COAL posts of mine. Previously all he had to go on was the 2-page ramble I wrote for the Slant-6 News when I was 15 and we’d had the car for about a year. Kind of a cringe-inducing read, now; I had a lot less practise as a writer back then.
A quirk in my 62 Valiant: one of the arm rests is actually carved wood. The original owner took a small piece of 2×4 and did a decent job reproducing the original armrest.
Wow, that’s nice craftsmanship! Even the colour is carefully matched. Much better executed than the wooden armrests in this Valiant III (scroll down).
Your sentiments mirror mine Daniel. When the time comes to put my current, old but not classic, daily driver out to pasture, I am done with old cars. As much as I do not find modern
Vehicles appealing, I dislike constant fiddling
And vague worry more. The memories are mostly good, I will let them remain that way.
I’m really stuck: I’m done with old cars, but new ones are rapidly reaching the limit of unappealing and barrelling rapidly toward repellant. I plan to write about that quandary soon.
Here’s to good memories, eh!
I will accommodate your desire – I have a little wistfulness at seeing it go, but will congratulate you on moving forward into the next stage.
You have put into words something that I have been feeling – life has been simpler without a “play car”. Even when my play car was a Miata from the late 90s so that parts and service were not an issue in the slightest, I found that I lacked the time or inclination to dive into those many little tasks the car needed to be brought up to first class condition – like the noisy speedometer cable or the really stiff window regulator on the driver’s side.
I still get tempted by the idea of a fun old car, but am starting to wonder if I will ever go there again.
I have decided that perhaps the best old cars to own (if you are not into the muscle cars that are most popular in the US) are those that were popular in Australia. The Aussies have reproduced lots and lots of stuff on cars that are not that highly prized here.
Last thought: A second look at the lead photo points out the one item that never went through the Daniel Stern Improvement Process (TM): The way old Mopar clapper-style wipers always park with the passenger side wiper sitting higher than the driver’s side. I fought with this on my 59 Fury. Adjustments to the wiper arm on the knob only made the passenger wiper slap against the lower windshield trim at faster speeds when I got it adjusted to where it parked right. There was clearly some slop in the linkage that needed attention. In every single one of these cars ever built after it got a few years old. If you see one with evenly parked wipers you can be sure that someone pushed the passenger side arm down to match the other one.
Yup, that’s true about those wipers; they never did park neatly together on their own. I often wished this car had the variable-speed wipers—more for the somewhat increased adequacy than for the “off-glass parking” accomplished by running the motor in reverse when the switch was turned off, which activated a trick mechanism to shorten the linkage and pull the wipers down further than just stopping them at the bottom of their normal travel. But that wish was based on the assumption of perfect function. That trick mechanism is an intricate sandwich of cams, springs, specially-shaped washers, and fairy dust that connects the variable-speed motor’s crank arm to the linkage—no fun to try to put together, and the magic doesn’t work unless everything is exactly right.
That anonymous quote on page 3 nicely encapsulates the revelation I had myself a few years back. After realizing my own classic car dream a few years back, I realized that the constant wrenching and worrying about what might break next wasn’t worth it.
I switched to modern cars and haven’t looked back. I dearly love my Mercedes SLK roadster. It is more fun and comfortable to drive than just about any vintage car. I push the button and it starts right up. Every time. I can just jump in for a couple hundred mile trip with no prep (and no toolbox), confident that I will make it to my destination (and back).
I can get stuck in a traffic jam cranking the A/C without worrying about the engine overheating. I can have it serviced just about anywhere. Basically I can spend all my time just driving and enjoying it.
Anonymous quote…?
I went through the same existential crisis as you did, Daniel. I’ve temporarily worked it out with my recent purchase of a 2002 Chevy Silverado. It fulfills my classic car needs in certain ways – vinyl bench seat, manual windows and locks, and most importantly, a bit of the personality of a classic – while more importantly being a modern, dependable vehicle under the skin where it really counts.
I could wish to find such a vehicle in passenger car (rather than pickup truck) form. Or, even deeper into dreamy-dream land, I could wish for an electric car one can outright buy and own, not connected to the internet.
I have mentioned it before here, but I have this fantasy that at some point in the next 10 or so years it’s going to be possible to source a reliable electric drivetrain (engine, battery pack, and ECU) that can be implanted into a “classic” vehicle. 10 years from now, that “classic” might be something that is presently not that old…or it could really be nearly anything from the internal combustion era. I see no reason why such a thing would have to be tied to the Internet (I agree, I wouldn’t want that).
Theoretically, such an arrangement would continue to allow for a fair bit of tinkering and attention to things like body parts, suspension, and yes…even lighting; but without engaging with quite the number of parts that come with internal combustion engines, and of course, less negative environmental impact. I suspect that for quite a few reasons (taxation, for one) this could possibly be the only way that the public (at least in the Western world) will be able to engage in the old car hobby in the not too very distant future.
Seriously great COAL, Daniel. I hope you do get Down Under to visit the Lancer!
“. . . I have this fantasy that at some point in the next 10 or so years it’s going to be possible to source a reliable electric drivetrain (engine, battery pack, and ECU) that can be implanted into a “classic” vehicle.”
I’ve never really investigated because it isn’t my thing, but I think there’s a subculture of people doing it now, using the guts of wrecked EVs. I assume you mean buying the components new as a kit. Who knows, maybe that will happen.
Things such as this:
https://www.electrive.com/2020/11/02/gm-announces-electric-conversion-kit/
give me hope.
Daniel, I so appreciate these COALs! They’re typically so excellent that I don’t comment at the time, waiting for the time to compose a worthy comment, and then real life intervenes and I don’t post anything.
In any case, I’m very sad to see that the end is in sight. These have made Saturday mornings something to look forward to.
In any case, here are a few thoughts:
1. I am happy that the Lancer went to a good home. I’m impressed that the Aussie enthusiast was interested enough in a left-hand-drive car to jump through all of the necessary hoops.
2. I was initially put off upon seeing the not-a-bunch-of-bananas intake manifolds, but then realized (duh) that they accommodated three carburetors, and thereby provided near-equal runner lengths. Awesome!
3. I commend you for your honesty and integrity in all of these dealings. If only everyone were so …
4. Your COAL installments have helped me, to an extent, recover from my dream of somehow getting hold of one of my dream cars, one of several Japanese econo boxes from the early ’70s. I think I’m starting to realize that it’s not only about the cars themselves, it’s also about trying to recapture the feelings of being that age, with a (seemingly) limitless future lying ahead of me. “If only I owned a (insert dream car here), I could/would …”
Please keep them coming. Buy weird cars as required, have adventures, and then write them up. It may be necessary, once you’re caught up, to buy a car weekly. ;>)
I read this one with great interest, as I’ve developed the opposite feeling as my human odometer is very close to turning over to sixty years old replacing a relatively modern car with something much older that I can actually repair myself without having graduated from Starfleet Academy. My budget is such that I can’t farm out everything to a shop and also my budget is such that buying a much newer car is currently out of reach. So I do 99 percent of my own repair and maintenance. I have four vehicles in my fleet from 1968-2002 all Mopars. The ’68,’79 and ’89 vehicles are all much easier to fix and maintain than the 2002 Chrysler Concorde Lxi which when everything is good, it’s a great car with good power and gas mileage but when it’s bad, it’s maddening and I won’t go into it because it then becomes a book instead of a comment. In spite of that, the car has made it to 253,000 plus miles so far.
There is a pretty nice 1975 Valiant sedan near me that is really tempting but I’m trying to resist that and just fix the Concorde one more time. It’s the kind of car I know almost as well as a C or R body having had a slant six Duster years ago in a family that’s had numerous Valiants and Darts over the years. Mid to late 80’s Gran Fury/Diplomats look awfully tempting as well.
Under other circumstances, I’d be quite happy to farm out work on a modern car to someone else but that’s not where I am at this point in life.
If comments on forums and You Tube are to be believed, I’m not alone in this feeling mostly from people who seem to be in about the same position I’m in where they are not always looking back with nostalgia but for something they can fix instead of having a car that is so complex that something that wouldn’t stop an older car turns the newer one into a very large paperweight. I’m not at all against modern cars, I just can’t afford to fix them when they like all cars before them inevitably need repair.
I bought an air conditioner weighing about 70 pounds a few months ago from Amazon (it was out of stock locally). The UPS guy brought it from the truck to the front porch by dumping it over and over (like rolling a ball, only a square ball). Seriously, they deliver stuff like that all day long and don’t have a hand truck in the delivery van?
Before the house‘s death warrant came due, I sold two of its original-to-build appliances. One of them was this beautiful Thermador WO-16 wall oven, which had very low miles on it since grandma usually used the main range. The Thermador was bought by a lady clear across the country whose own WO-16 had finally gone unfixable, and she was tickled to find another. I put mine in the back seat of my Accord and drove it to FedEx Office for them to pack up and ship to its new home. They did a fine job of it, but the delivery driver dropped it on the recipient’s concrete front porch, right in front of her. Not because he lost his grip, not by accident, just because he couldn’t be arsed to do his damn job correctly. This was the kind of potential eventuality that had driven me to let FedEx do the packaging, so they couldn’t worm out of a damage claim by blaming it on my packaging job. They paid the claim, the new owner carefully unbent the oven’s corner sheetmetal, and now she happily bakes cookies in it.
+1 for the WO-16. Even down to the phillips screws on each corner.
(even if this is perhaps more appropriate for Counterside Classics)
The story of this Lancer has been the most remarkable write-up of a car and its owner(s) I have had the pleasure to read, and at this website, no less. That makes it doubly satisfying. Once again, thank you for documenting this amazing journey of both of you.
I totally understand your epiphany about old cars in your life. I’ve actually been there forever, as something in me kept me from going there. Yes, I dug up some more comfortable ’66 seats in a junk yard for my ’63 Beetle, and had its engine rebuilt when it didn’t really need it, including big-bore 1350cc cylinder barrels. But the expense of that nagged at me for way too long, especially after it blew up a year or so later, probably in large part due to running too much advance in the ignition.
Ah, but what about your ’66 F100? you may well ask. I bought it as a cheap work truck, and that’s all it has ever been for me. I only fixed those things as they truly broke, and were essential to keep it working. It’s sat outside all these decades. It’s been essentially the polar opposite of your Lancer.
Yes, I did fix a few things last summer that didn’t absolutely need to be like have new floor pans welded in and a welded patch on the roof/rain rail connection to slow down the worst of the rust issues. And some new control arm bushings and new shocks. Mostly easy-peasy stuff, and I actually rather enjoyed the work, because I hadn’t done that kind of thing in quite a while and wasn’t too hard.
And then there’s the current transmission crisis, which means it’s sitting under the tree behind out back fence, forlorn. I’m debating as to what to do with it. Part of me could readily let it go. Another part says to fix it. I’m still having that internal debate.
As to the enjoyment of working on/modifying one’s old(er) car, I was somewhat surprised by my enthusiasm in modifying my xB to make it more suitable for rough/off road driving, including the Nevada overland trip this summer. I’m almost 69, and I wondered whether I would still want to do that, taking apart the front struts and springs, removing the sway bar, installing the lift blocks frontt and rear, etc.. And I did most of twice, as I jumped the gun and did the lift first with the original springs and struts/shocks, before I had educated myself about the benefits of the softer ones from a Yaris.
The xB is a pretty easy car to work on, and it was satisfying. Perhaps it was because I had a specific mission and goal, to participate in the EXBRO trip. But more than that, it materially improved the issues of the stock xB’s overly harsh ride; it’s much more comfortable now, so the work was worth-while.
I think the key thing is the actual relationship, meaning how much it’s driven by compulsion or other emotional factors. I don’t feel burdened by the F100 (or xB). I don’t think about them, in terms of new parts or improvements, or how to keep them from aging, as they inevitably are. Both will meet their demise at some point, and I’m ok with that, just as I’m ok with meeting my own demise at some point.
It doesn’t take a Freud to point out the obvious: trying to perpetually improve or even just sustain an old car in original/better condition is a way to create a form of immortality that we ourselves cannot ever achieve. A properly pampered car will outlive us. Nothing wrong with that, but it takes some doing to achieve. And it’s probably a good idea to acknowledge what’s driving that. And whether that’s actually a healthy thing.
My other issue is that cars have never been all that high a priority in my life, contrary to what might be assumed given my role at this website. I have other interests, and they generally have priority. I’m getting ready to take a hike in the mountains today as I write this.
Improving my xB was for a specific purpose: to allow me to explore the outdoors more fully and more comfortably, and not for the sake of just “improvement” in a more abstract or idealized way. It’s a tool, and if I can make it function a bit better, a one time effort to do so is worth it. And the same goes for my truck. I need it to haul gravel and such, as backing my new utility trailer down long curving driveways, and into little driveway off an alley is sometimes rather difficult.
Having healthy relationships to our things is paramount. I’ve been making that a priority for a long time, and it’s an ongoing process. Having just bought a terribly neglected overgrown 7 acre property shows that it’s an ongoing process. Everyone has to find their own way in this.
And you’ve certainly found yours. Congratulations on the outcome of that journey. You clearly had something of an obsession with these cars, and obsessions are very much a mixed bag. They can really hold us back, which is of course the critical aspect. One needs to keep moving forward, on ones own path, which will always be different than someone else’s path.
I was privy to some of your process around the Lancer and its sale (as well as your grandfather’s house) so a appreciate the deep challenges they both presented. I’m proud of your ability to keep moving forward. As well as to share that journey in such an engrossing and enlightening way in this series.
Thanks you for this epic tale of Slant 6 obsession. What, if anything is next? An epic discourse on internal geared bicycle hubs?
I am going to miss that Lancer! What agreat journey you and that car had Daniel, and thanks for sharing it with us all.
I recognize the getting older and being done with old cars feeling, maybe we even get wiser!
Messing about with old cars does wear off though it hasnt quite yet and Ive had a spare hobby car since the early 90s, make and model have changed though now Ive settled on one brand and a daily car that requires only periodic maintenance oil changes brake pads etc the hobby car is getting tidied up not restored that only consists of removing dents and a outdoor repaint twin carbs and headers not a full rebuild of anything been there done that on others the huge collection of spares accumulated by the previous owner are being dispersed piece by piece as people ask for them.
There will always be something to do on that car that doesnt really need doing urgently so Im leaving a couple of repairs alone untill later just because I can.
As with the Spirit R/T, it was a matter of finding the right buyer.
There was a time you simply couldn’t register a LHD car in Oz, full stop, and then they changed the law. A bit of irony there in that back in the day, you had the idea of importing an Australian Valiant, and your parents said no.
I’ve never had the disposable income to have both my daily driver and a play car, but I’ve looked for some element of play in my daily driver. Right now I have a boring car because my previous car was totaled and I had to get a car in a hurry, but I’m thinking ahead to something more interesting. It will probably be MY 2005 or later, and I’ll need to hire out the wrenching, but I was never very good at DIY wrenching anyway. I think it’s a shame that the world is going pretty much SUV/CUV and there aren’t many sedans to choose from.
I once bought a used ink jet printer from ~2K miles away on eBay. The seller put it in a cardboard carton with no bubble wrap, no packing peanuts, no crumpled newspaper, no padding of any kind. It was ruined in transit. I had to use a great deal of willpower not to give her a piece of my mind.
That business of scanning the armrest and mixing color-matched paint is amazing! I had no idea anyone offered such a service.
Great read… loved that aluminium block.
I worked in the valiant factory in 60s and 70s in South Australia and saw lots of ideas and changes. After owning a few valiants I found lots of changes across suspensions from R series to S and the AP range.
Did yours have the 8 volt ignition system with the ballast resistor ?
My valiant got the twin carb shaved head big cam when an oil line fractured and I needed a rebuild. I picked up a spare engine and took it home in the boot!
Then in Australia they released the 245 hemi which was stunningly powerful.
Your pictures are great.. still looking for mine ..
Old cars.. down to 3 now : 99 jag, 99 porsche and 78 Pellandini. All easy to work on. The Pellandini story has a great write up in Retromotive “a rare fibreglass monocoque sport car”.
Thanks for your story and history.
Hiya, Paul. You’re welcome and thanks. Hey, neat! I bet you’ve got good stories from the Valiant plant. Yup, giant differences all over the place between the R and the S, then a much slower change of pace after that.
Ballast resistor, yes, though in a do-over I’d do this instead.
The aluminum engine was good for at least one party trick.
I’ve seen one 245 in person, but never heard one running, let alone driven one.
Hi Daniel
Me with my pre white beard in 1979 doing a Donington Park lap in Pellandini.
You guys still spell aluminium wrong !! Ha..
What an amazing COAL Daniel. This is so much more than a story about the car, rather a epic tale about you and your father. I have heard you speak of the Lancer of the years and I was always curious why you let it go and now I know. Even before I read the conclusion to your tale, I could see where it was going. You painted a vivid picture of your fiery passion in your youth but also how it slowly dwindled away with time. I am happy to hear the Lancer went to a good home so I am sure it will have many years more of life left in it.
Dan, thanks for the story.
I have a friend that is still driving his Dad’s 1994 Cadillac. My friend is 76 years old (I’m 78). He loves the old car, but can’t turn a wrench without hitting himself in the forehead with it. He’s an only son and vowed that when his Dad passed, he would take care of the car. It’s cost him a small fortune to keep it running as he has to have a shop work on it when something goes wrong. That Cad has about 200 K miles on it and the suspension is shot, but it’s still moving under its own power. I put an aftermarket radio in it for him. Do you believe that in 1994, Cadillac did not use radios that fit a single or double DIN opening? I had to make a mount and trim for the install.
I’m done with old cars now as I sold my last restore project a year ago. It was a 1971 Super Beetle that I brought back to life after it suffered a tough one (but not rusty here in Texas). I spent a few thousand dollars on aftermarket parts that were are Chinese knock offs. All Class A Junk. That’s all there is out there unless you buy used stuff, which I did some of. But after two years of rebuilding everything, and a torn knee meniscus fixed via scope surgery from a fall when working on the brakes, I was done. A friend and I painted it in his body shop and I listed it on Craigslist and sold it in a day, I actually broke even on the cost, but all the work was done by me over a two year period.
Before I sod it, I drove it for a few days here in north Houston. I forgot how small the VW was as I was much younger when I had a dozen of them. In Big Truck Country, a Beetle is really scary to drive in fast moving traffic made up of monster trucks and big SUVs going 75 MPH. Two days and my dream of using this as a daily driver were over.
Another friend has a 1965 Corvair convertible that is now in it’s 4th year of restoration. I have been helping him on occasion. He’s 71 and not much of a mechanic so I help when he asks. Those Corvairs are a real PIA top work on.
My wife said I should fold up the shop and just enjoy my 2005 Mustang convertible while I am still able to get in and out of it….LOL.
Yep! Starting around 1985 or so, when they moved away from the old twin-shaft design, GM used their own DIN-and-a-half radio size (so did Chrysler, starting in ’77 or so, but their 1.5DIN wasn’t the same as GM’s). At least GM and Chrysler had the decency to stick with their nonstandard size for a long enough time to create a variety of options in OE radio sets and enough of a market to spur the commercialisation of aftermarket arrangements.
Preach on, brother! In September 2010 I bought a passenger sideview mirror for my new ’73 Dart. I knew when I bought it exactly where it was made: China. I’ve been a product development manager, and I know it is possible to get good quality from China, but it takes a great deal of care in selecting the job shop, and constant supervision and babysitting to make sure all specifications are followed throughout production, not just for the approval sample.
One March day while washing the car I noticed that this mirror housing was showing significant crumbly white corrosion after less than six months in service, in a temperate climate. The left-side mirror housing, which was original equipment, was uncorroded after thirty-seven years, many of which in a harsh climate.
I called the vendor. It didn’t go well. “Dave” said it was the first report he’d ever had of such a problem—I’m not sure whether he was lying or new—and that he would need to talk to the manager and get back to me within an hour, which of course he did not. Nor the next day, nor the day after that.
I called back and Dave picked up again. I reminded him who I was and he said “Oh…yeah…I asked the manager and she said there’s not much we can do for you because it’s after thirty days.”
I said “Oh. I see. May I please speak to the manager?”
Dave said “Well, it’s after thirty days.”
I said “There are a lot of people waiting to see how this plays out, and I think you’d really much rather have the they made it right and took care of the situation for me report than the they told me to go get stuffed So…may I speak to her, please?”
Dave said “She’s on the phone. I’ll pass it to her again and she’ll get back to you.”
I said “Okeh, two things: When do you think she’ll be calling? I want to keep the phone line clear so we don’t wind up missing each other. And how come you didn’t call me back yesterday as you said you would?”
Dave said “Oh, she was going to call you.”
Me: “The manager was going to call me?”
Dave: “Uh…yes.”
Me: “The same manager you were just having a hard time deciding whether or not I could speak to, or some other manager?”
Dave: “Well, we only have one manager.”
Me: “Okeh, just checking. So when do you think she’ll be calling?”
Dave: “Probably really soon.”
Me: “Okeh, thanks. Bye.”
Shock and surprise, Ms. Manager never called back. I eventually called again and asked to speak to the big boss, a man pretending to be named Peter. Dave said Peter would be available the next week, Tuesday or possibly Wednesday. Even more shock and surprise, he wasn’t available either day. A few weeks later I did get to talk to him, after a fashion. I politely explained the situation, including the lack of callback and follow-through by his employees. He didn’t comment at all on that, but with a very thick Chinese accent, he threw a big bowl of assorted excuses at the phone to see if one of them might stick: it must be my driving conditions, it must be my weather conditions, it must be bad luck, I must have damaged it during installation, he’s the manufacturer and he personally makes sure every mirror is triple plated, I’m the only one who’s ever had this kind of problem with any of his products, etc. Eventually he offered to replace the mirror if I would send in the corroded one, knowing I wouldn’t bother because of cost, aggravation, and the reliable fact the new one would corrode just as badly, just as quickly.
So that’s a(nother) reason I’m comfortable with my decision to stop keeping old cars: I no longer have to slog through sewers to pay money for part-shaped trinkets for old cars, then waste additional time afterwards.
There’s that, but also ponder: y’know how fast your new computer or phone seems when you first get it? Zoorch!, as the old car ads used to say when they were new car ads. Just amazing. And then it happens again with the next new phone or computer, and the old one seems just unusable; nowhere near fast or capable enough.
I can dig it. Though to be entirely fair, 75-85 mph speeds were common on American Interstate highways prior to 1974. Not many monster trucks and SUVs, but plenty of monster passenger cars, with much worse brakes and tires. Nobody was futzing with a celphone, but a lot of people were at least halfway drunk. Still, driving an oldie in modern traffic is really scary, not least because you’re the one who’s going to suffer, very badly or worse, in a bad crackup. And in a not-so-bad crackup, you’re going to face big, costly hassles with parts and insurance and whatnot.
“how to let go and look forward”. The best part of it.
You’re a much happier person now. That forward thing is good. 🙂
Peace, Dan!
It’s true, I am. I make a much better (much more content, effective, competent…happier…) grownup than kid. Could wish my knees and sinuses and eyes and spine weren’t quite so constantly plotting against me, but.
(Peace? A noble goal, but small steps; I’d settle for everyone using their turn signal when warranted as a start)
Enjoyed the story, and pleased to see you’re helping Australia’s export!
I have no desire to pull out the spanners again (insofar as anything I ever did under the bonnet ever did any good). As soon as I’m forced to fix some glitch on the car now, every memory of not having quite the right tools or time or space or cash rises from burial in memory and announces its displeasure at being so unearthed in such a dark way that I get sweaty and cranky within minutes. The conclusion, at about the second ripped finger and thrown screwdriver, is that I am retired from all that, and the memories dutifully re-bury themselves upon the dialling of the mechanic.
But like some impotent porn-watcher, I enjoy reading the tales from those who can, including the many done in Valiantland here. It is a combination of awe and equanimity, the latter because I can always understand how to do it when someone else does it instead, and sleep in the belief that, yes, we can, (which, for this We now writing, We ofcourse cannot, but the sleep is nevertheless sound).
“The past is a foreign country: they do things differently there” (LP Hartley in The Go Between, good book and lesser film). That is an abiding truth still. I was struck particularly by your observation about the expertise and junkyards, that they’re are still freely what they were, as that is in the mind of probably all nostalgists here (which is all here, methinks). Instead, there are just crashed grey Hyundais, soon for crushing, and silence from the many graves of those who once (grumpily) shared their great mechanical knowledge.
The poor Lancer has had to travel awfully far to be re-loved, I must say. Why, any further away and it’d be on its way back again. (Btw, it does snow in Western Australia – down south at the top of the Stirling Ranges, about twice a year, so your man needn’t have gone more than a few hundred miles from Perth, though only on the right day in winter). Mostly, though, WA is hot and dry, so the dear girl should not rust any more. And if he takes her up the old mine at Wittenoom, she can be re-bathed in all the blue asbestos dust that was so rudely removed from her. As an aside, it’s a bit hysterical, the sealed asbestos thing. Australia made the world’s supply of the crap, and possibly millions of old homes here are not insulated and lagged with it, they’re BUILT from it top to bottom (house of my childhood included). It is for sure awful stuff, but if left undisturbed, it causes no particular problem. Brakes, clutches, any obvious lagging stuff, for sure, don’t let it in. But anywhere it’s there for good, like underseal, I mean, really? I suspect that that section of Customs – or, in its current fascisistic name, “Border Force”, true story – has a plentiful supply of jobsworths, quite possibly Oz relatives of your US border guards. I have heard some incredible tales of Kafkaesque pettifoggery from folk trying to import cars here.
As it made it, I will make sure to keep an eye on the car for you now it is local. Actually, I won’t, as it overshot my part of the country by literally 2000 miles, but it is the thought that counts. Rather like my mechanical skills.
I do not look forward to the end of your series, Sir, so excellent has it been. Perhaps you could continue by just making some stuff up, I’ll believe it.
“ I do not look forward to the end of your series, Sir, so excellent has it been. Perhaps you could continue by just making some stuff up, I’ll believe it.”
Brilliant!!
This is a brilliant summary of what my old-car habit (or whatever we’ll call it) gradually came to feel like.
Eh. Porn gets a bad rap in puritannical circles, but the analogy holds. The real thing is coloured lights and magic when it’s good, but when it’s bad it’s like eating a photocopy of a picture of a steak; better to just stay in and pull up the prØnz, then go to sleep.
Right, now you’ve done it; I’m filing you with my other favourite Australian writers. Tony Davis and John Wright and that lot.
Oh, is that where that came from? I didn’t know. It’s such an apt observation. I caused some feathers to fly when I invoked it some years ago here on CC.
I’m sure he’ll do asbestos he can.
Two thoughts here. (1) I will never fall out of love with the term “jobsworth”, and (2) “Border Force” is somebody’s dick-swinging fantasy term, but it could be worse; you could be an American and have to share a country with the former president’s Space Førce.
Thanks kindly! I’m sort of at sixes and sevens over what to do once it’s over, myself. As to making stuff up—er…well, it’s a fine idea, but I feel as though my skill and talent are in telling true stories, and I’ve no ability to create characters and events from my imagination. Then again, until very nearly the end of my COAL series (i.e., yesterday) I didn’t think of myself of a writer, so perhaps there’s hope!
Don’t fret; I’m not going anywhere. There’s lots left to write about even once I’ve finished my stint in the COAL mine.
I haven’t yet reached Daniel’s existential crisis yet despite six old cars although going dual master in the F100 has tried my patience big time. I guess it is because they have been trouble free and have only needed basic maintenance that one would expect for an older car like bushing replacement. I still get satisfaction when the job is completed and I can immediately feel the improvement.
However, I have pondered at what point might I have to rid myself of these cars and which would go first, second, third and so forth. I do know that the Cougar, having been under my care for 53 years, will never go. Too much past connections being my father’s car first, then mine at 16, for me to ever part with it. Maybe I’ll be buried in it in one form or another.
I think the best we can hope for with the old cars we don’t want to or can’t care for any longer is for them to go to a good home, as your Lancer did.
When I bought my ’64 Impala in 1999, Betty’s previous owner said he wanted to sell the car to someone who would respect it and give it the restoration it deserved. We’re friends on Facebook, and he enjoys seeing pictures of her from time to time. She needs the surface rust to be attended to at some point in the near future, but I have accepted the flaws that will be just too much time, trouble and/or expense to deal with. As long as the car runs well, I’m happy to keep driving her.
Yesterday was a lovely sunny fall day in Oregon, so I took Betty to do my grocery run and other errands. Hadn’t driven her in a few weeks, but the enjoyment I get behind the wheel remains strong, all these years and nearly 90,000 miles later.
I also drove Dolly, my ’91 Miata some on Friday and Saturday, and it’s hard to believe the car is 31 years old. She has been quite reliable for six years and 30,000 miles, and like Betty, is fun to drive, albeit in a very different way.
As someone who’s as good a mechanic as Elmer Fudd is a hunter, I’m very lucky that my old cars don’t need much attention, and when they do I have a trusted (though not cheap) mechanic.
For now, at least, I’m enjoying this more than any echo. I hope that doesn’t change.
Sounds like a delightful day with Betty, and I share your hope for many more!
NOooooooooooooooooooooooooooo…….! not the end ! .
I hope you’ll keep writing as I think you have a deft touch with words , situations and feelings .
I’m in my 7th decade and still spinning wrenches, it causes a lot of physical pain but I still get the warm fuzzies when I button up a job .
Awaiting the tale of the Auzzi starter .
-Nate
An almost 5-year-old post, that I’m seeing today while missing my ’61 Lancer, gone now for over 20 years. Recently, I was trying to remember the period in which I owned it and hit upon one unforgettable memory. In October 2001 a lady friend and I drove the Lancer down to Manhattan from Rockland County in order to see an American League championship series game between the Yankees and the Seattle Mariners. She wasn’t into baseball, so she brought along homework for a college class she was taking. Of course, this was only a month after 9-11, and we were slowed down getting in to the game while the security guards went through her knapsack. It turned out to be the only game that the Mariners won in that series, by a score of something like 13 to 4. I also recall that we got a great parking spot in the old ballfield next to the stadium because the cops really liked my car and directed me to a good one.
The Lancer is a car I would like to have back, but that statement about echoes makes me wonder. Some of the cars from our past we couldn’t handle now because we’ve become accustomed to a certain level of comfort snd competence that they didn’t offer. I am 75 now and might be driving my last collector car. It’s a 1981 Suzuki SC 100 Whizzkid with left-hand drive, imported from the Netherlands. It’s quite low on its 12″ wheels, just 10 1/2 feet long and 1500 lbs. But I am aware of its relative mechanicalness, yet I have a blast every time I take it out. Who knows whether I will still be able to get in and out of it in five years(!), so I try to just enjoy.
Fear not Barry ;
I’m a long retired VW Mechanic/Junkie, I bought a raggedy 1959 VW Beetle and have been whipping it into shape and driving the wheels off it, nothing will make me feel young again but it sure does feel like 1972 whenever I’m whirring along in this old time capsule .
I doubt you could miss with the Suzuki, I’m sorting out a 2000 Tracker 4X4, it’s badged Chevrolet but is a Suzuki nd yes, so much fun to drive .
-Nate