
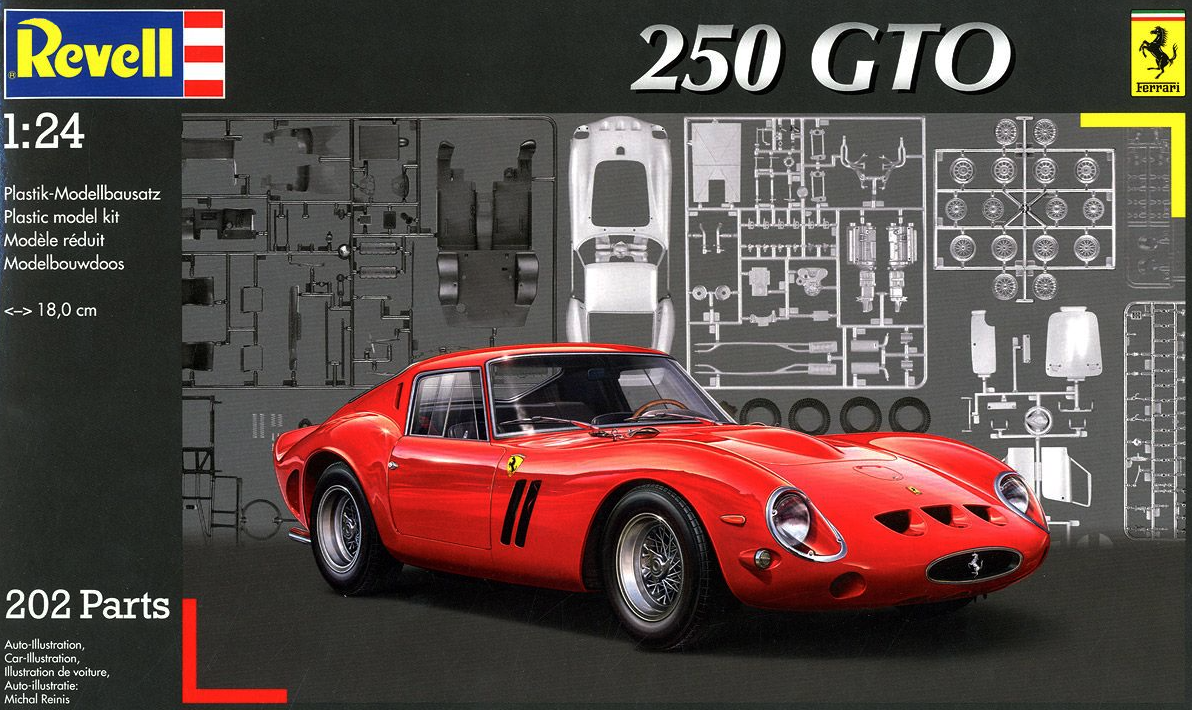
Caution: high parts count!
Model building is supposed to be fun. For the most part, it is. But every now and then I’d get caught out by an unexpectedly-complex kit. I remember being caught out by Revell’s 1960s Jaguar XKE, for example, which seemed to have an endless supply of parts. In those days, you often had little to go on beyond the box artwork, perhaps a few photos, or your familiarity with what a particular manufacturer considered a typical kit. Opening doors or trunk were a bonus, which are always mentioned as a selling point, but you knew they brought added complexity, and often a loose, sloppy fit.
Today, things are a little easier, with many manufacturers indicating a skill level on the box. But what do those ratings really tell you, and what are the differences between a simple snap-together kit and a more demanding, full-detail build?
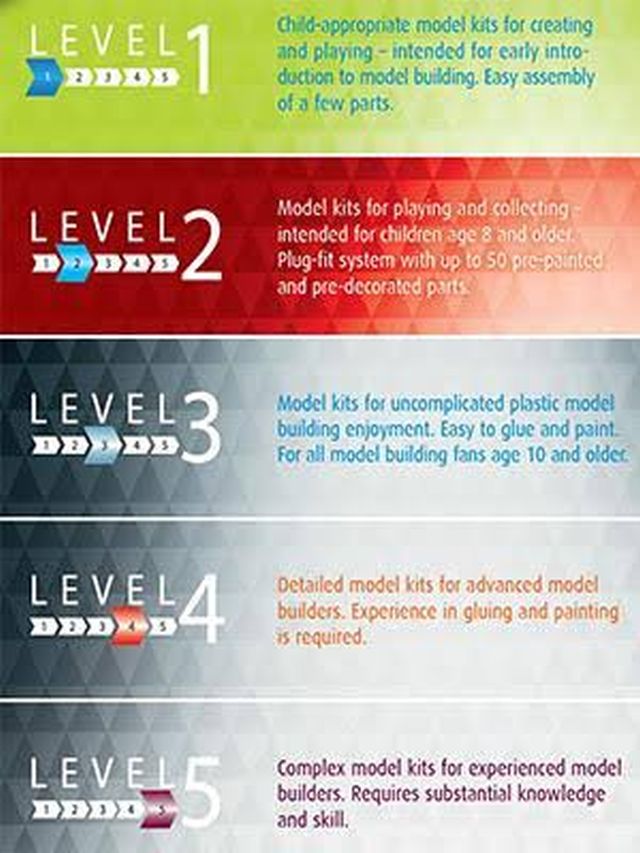
Revell’s guide.
As mentioned, nowadays you’ll often see a skill level indicated on the box. AMT uses a 1-3 scale, Revell 1-5. Moebius goes to 4; no, I don’t know why! You might think this means Revell offers more complex kits than AMT; this is not necessarily so. The Japanese brands don’t tend to indicate a skill level; but typically their simpler kits are cheaper, the complex ones more expensive rather than one-price-fits-all US practice.
Simplest: Snap-kits
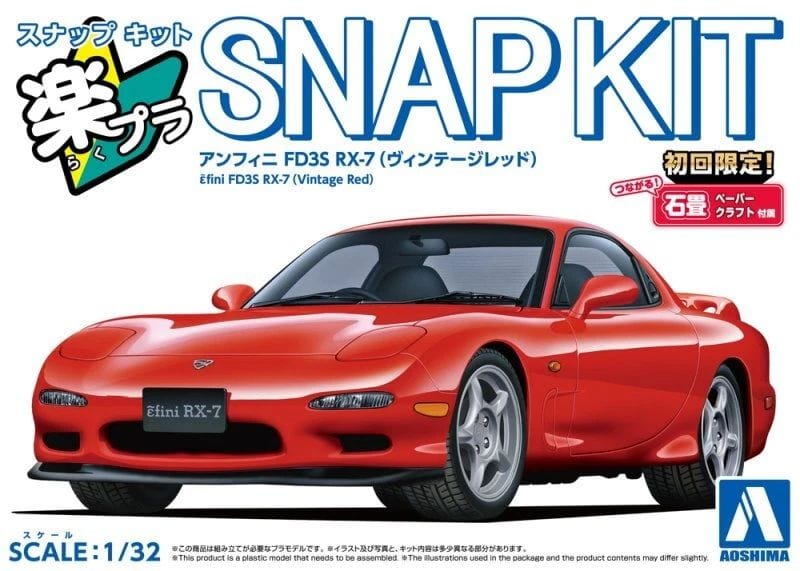
Aoshima’s 1/32 snap kits
Some kits are derisively referred to in the online modelling community as ‘shake and bake’ – they’re so easy to put together you can just about shake the box and the pieces will assemble themselves. Now there is definitely a place for these easy kits, but when you are an experienced modeller, there’s often not much satisfaction in them. Many of the older, simpler snap-together kits fit into this category.
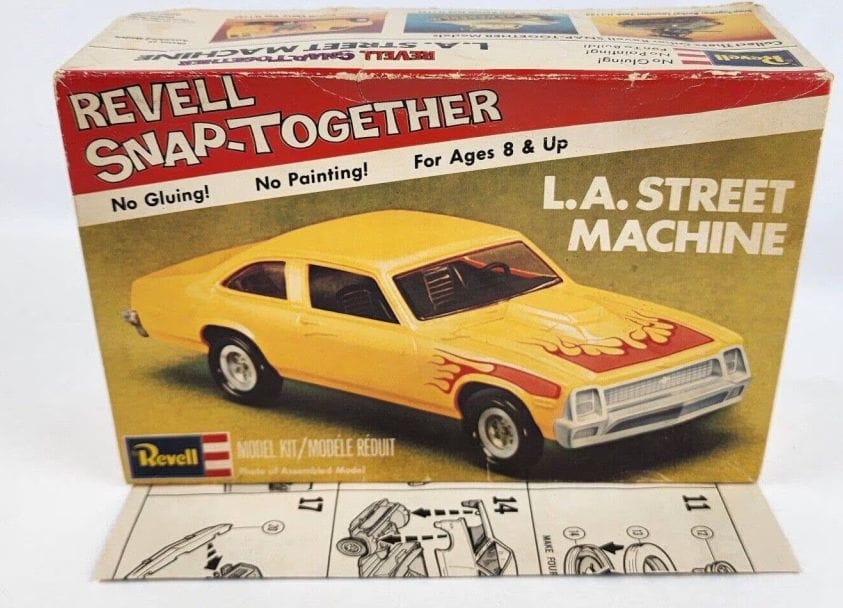
Seventies Nova snap kit
There used to be a real stigma surrounding snap kits. Typically, they were very simplified, had a small parts count, were often a smaller scale, sometimes tended to look a bit toylike rather than a scale replica of the actual subject. As realism was my main reason for getting into modelling, I didn’t buy many of those.
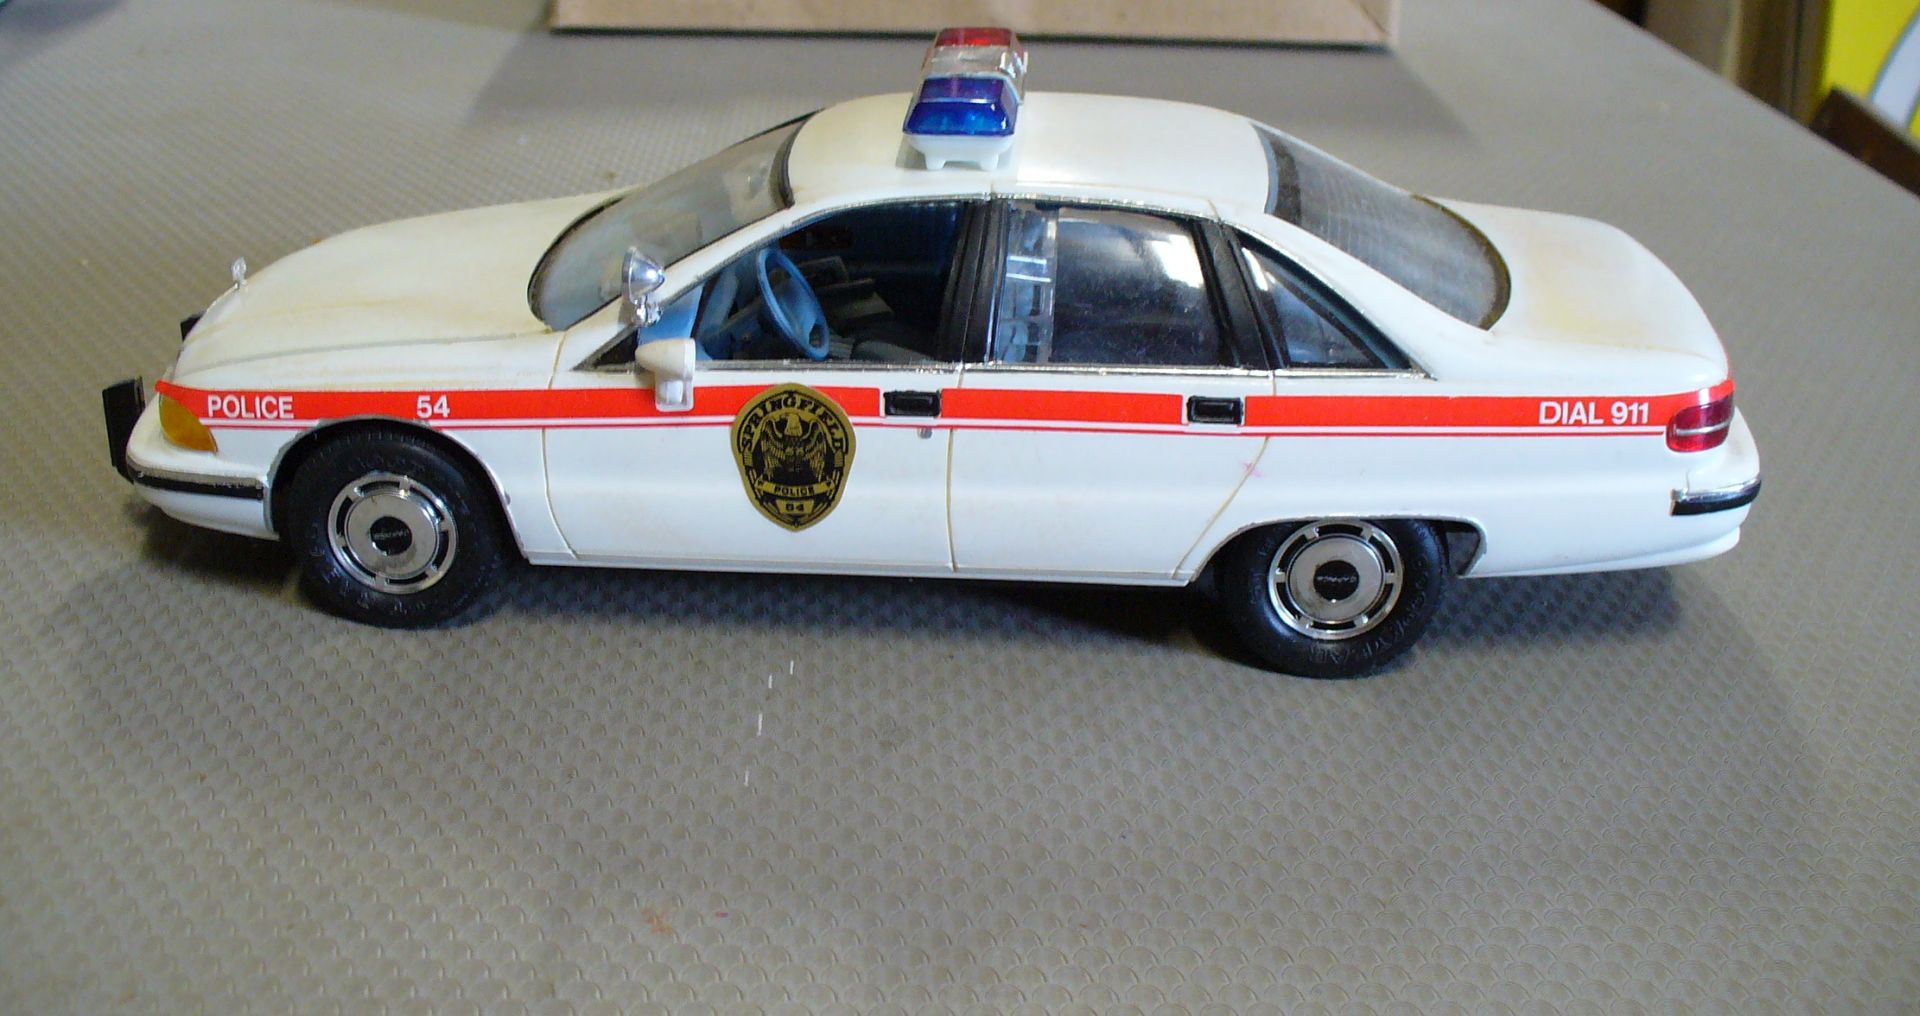
Revell ’92 Caprice raised the bar.
Nowadays snap kits tend to be much more accurate. I think the stigma largely disappeared when Revell bought out a snap-together ’92 Caprice police car. It was a full detail kit with an engine and a realistic chassis, and didn’t seem to be compromised in any way by being a snap kit. And they even gave you a working light bar (oversize, though), as well as an accurately-scaled one that didn’t flash.
Many modelers wondered why all snap kits couldn’t be this good.
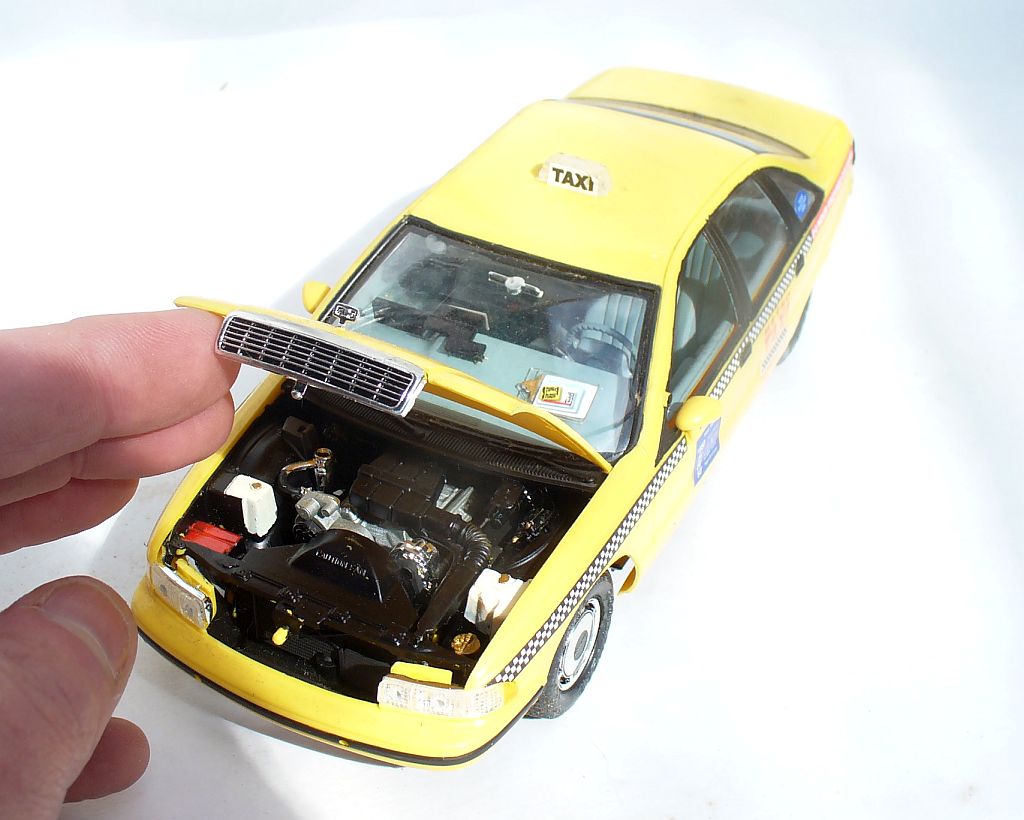
It later spawned a taxi/fire chief version, then was revised into a ‘94 Impala SS in normal, donk or lowrider versions, but I think some parts of these required the use of glue.
In 2000 Revell released a ’77 Monte Carlo as a snap kit, but this had a simplified chassis with no engine.
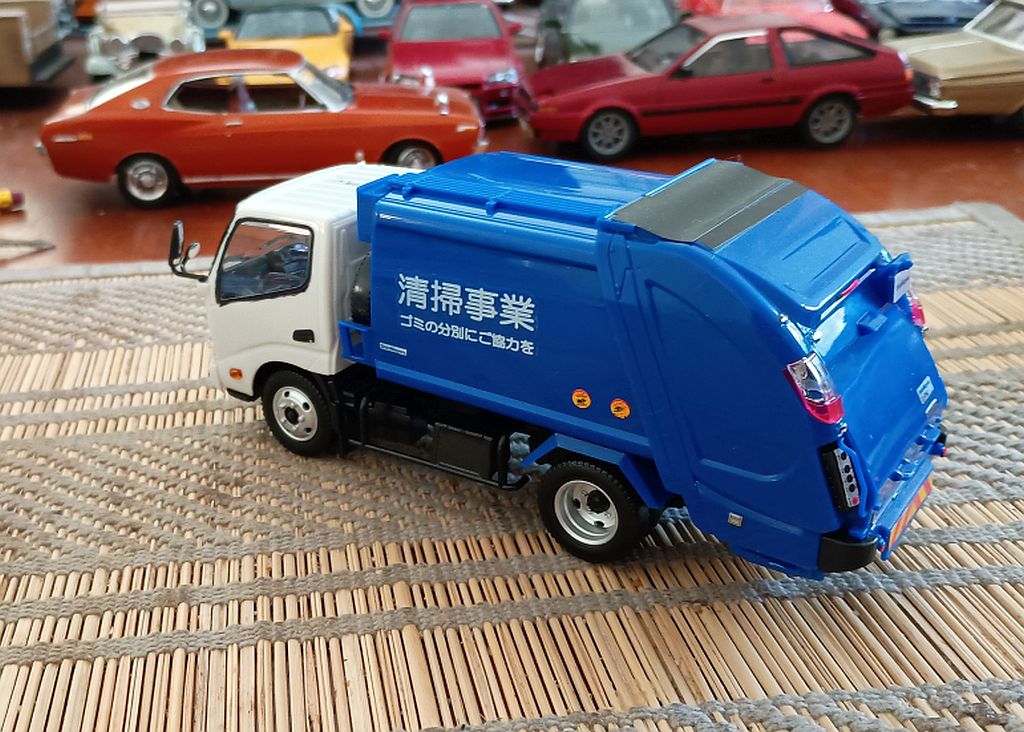
That said, there seems to have been a resurgence of interest in the concept among the Japanese manufacturers. Aoshima has offered snap kits in 1/32 scale since 2017, moulded in coloured ABS plastic (stronger, to better withstand snapping the parts together) with excellent die-cut stickers for all the necessary markings, and a very exciting-looking comic style instruction book. The garbage truck above is a 1/32 Aoshima Hino Dutro, new to the range this year.
Last year Aoshima expanded the range to include a few 1/24 scale kits as well, and last month Tamiya announced a new pre-coloured snap-together VW Microbus in 1/24.
Curbside kits
These are simple glue-together kits without an engine. Back in the fifties, all the American annual car kits were in this form; I think detailed engines only became a regular thing around 1960, and seemed to vary from car to car; my 1960 Bonneville has no engine, but my ’61 does.
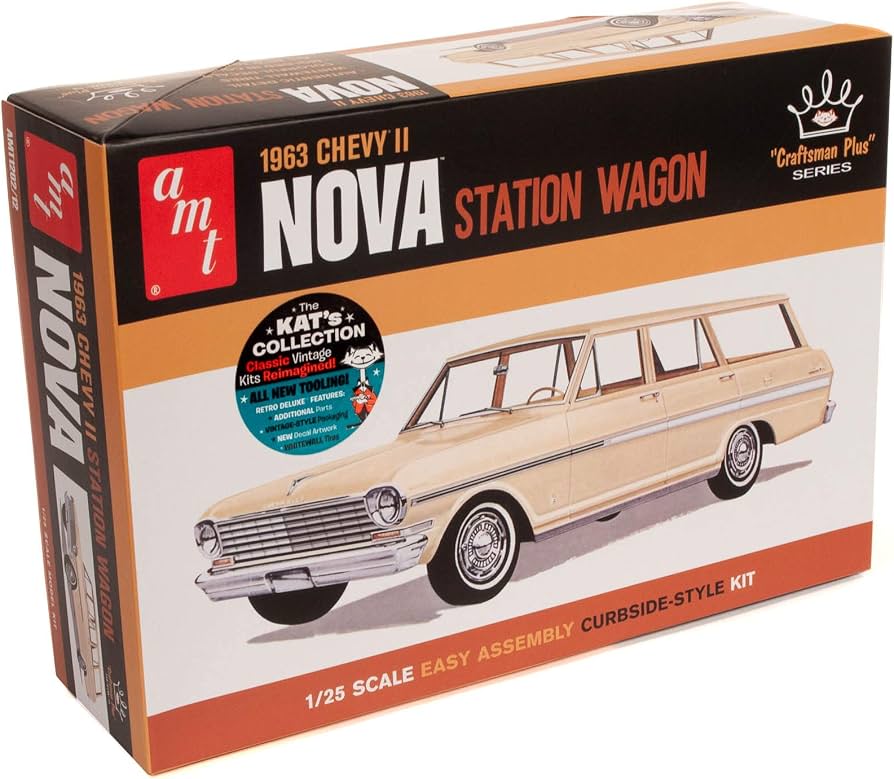
Curbside ‘Craftsman Plus’ kit, ready for an SBC.
AMT continued some kits as curbside ‘Craftsman series’ kits, and has recently revived the name for retooled versions of some of the oldies. Expect a bucket-style interior, and a flat platform-style chassis with moulded-in suspension detail. They also have the ‘Craftsman Plus’ kits which have a separate hood but no engine – useful if you have a lot of spare V8s handy.
Most Japanese kits are curbside. They are sure to mention it on the box if an engine is included.
Chassis detail
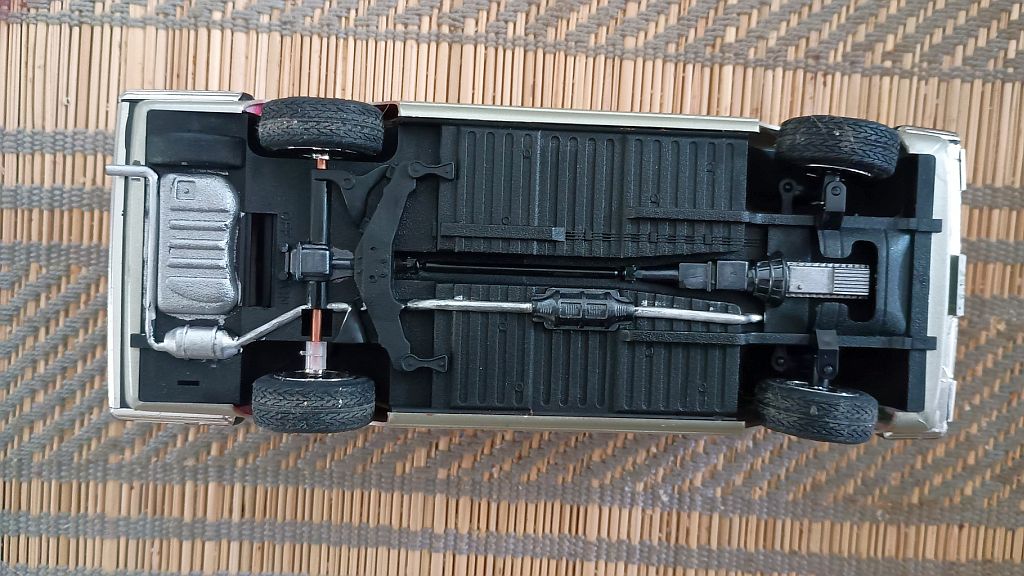
Old-style: Aoshima Nissan C31 Laurel
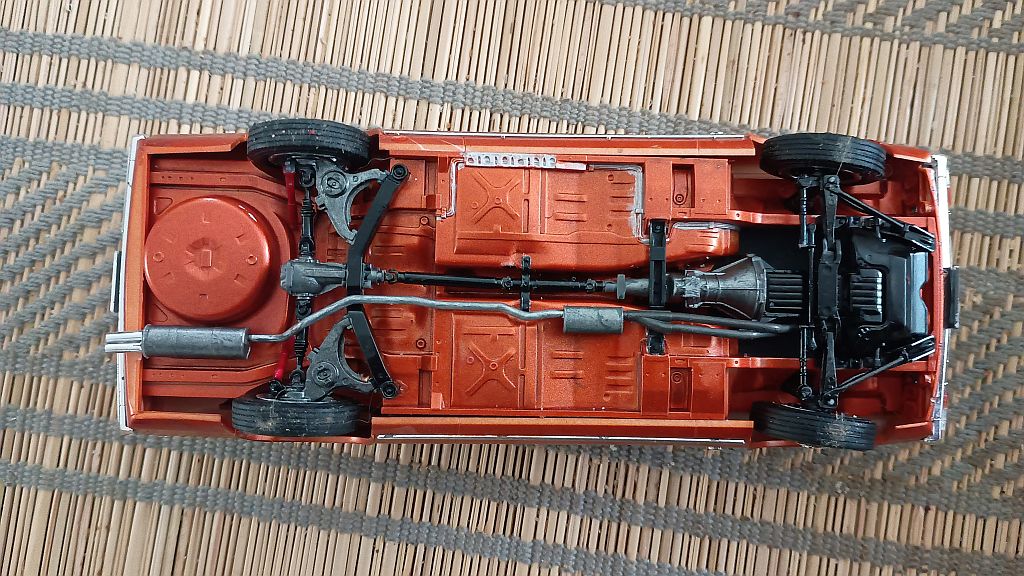
New – style: Hasegawa Nissan C130 Laurel
Returning to regular glue-together kits, many of the Japanese companies are making more of an effort to improve chassis detail with separate suspension parts and exhaust systems. Fujimi and to a lesser extent, Aoshima tended to mould the exhaust and driveshaft in with the floorpan. Here we see the difference with two Nissan Laurels; Aoshima’s vintage ’80 with approximate shapes moulded in place, and Hasegawa’s ’73 from two years ago, with all separate pieces accurately scaled.
Of course, having separate parts makes offering racing or tuner versions much simpler – just add a few new parts trees with different pieces needed for a specific version.
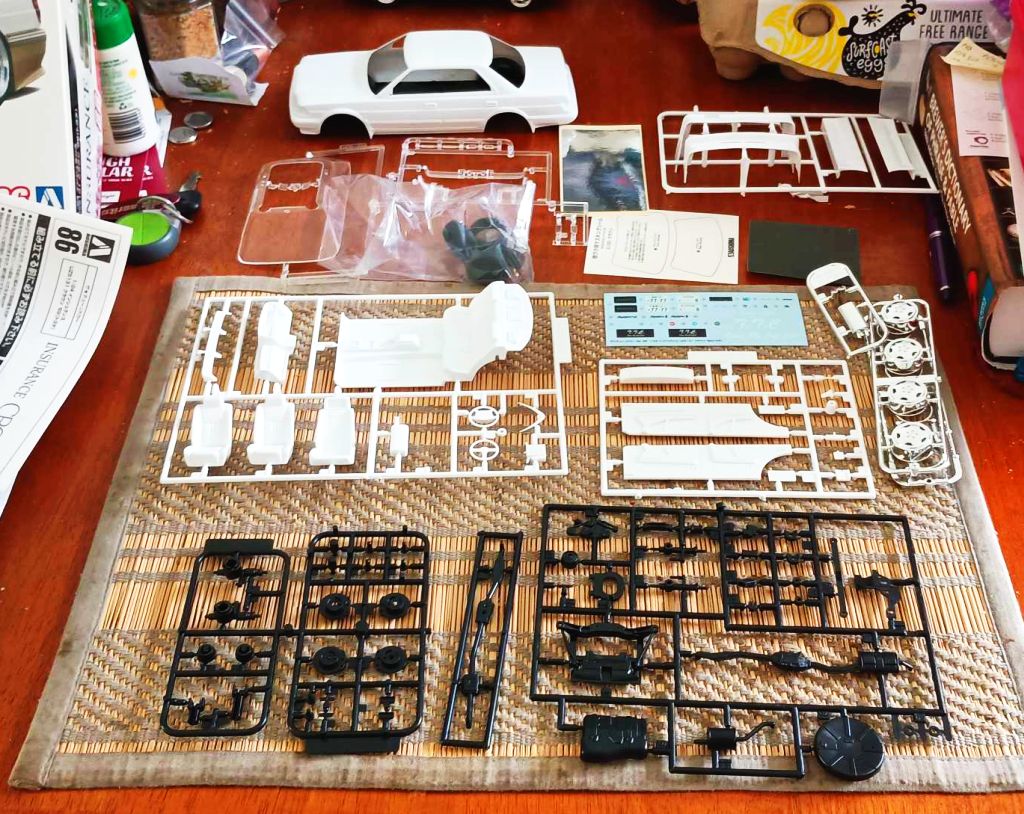
Aoshima tuner S130 Crown; extra bits down right of picture.
An Aoshima tuner kit typically contains three or four extra parts trees in different colours for wheels, exhaust, interior bits, and different body pieces. Usually there will be a separate stock version without those extra bits. It will typically be about ¥500-600 cheaper – about $US3-3.50.
What – Working Suspension?
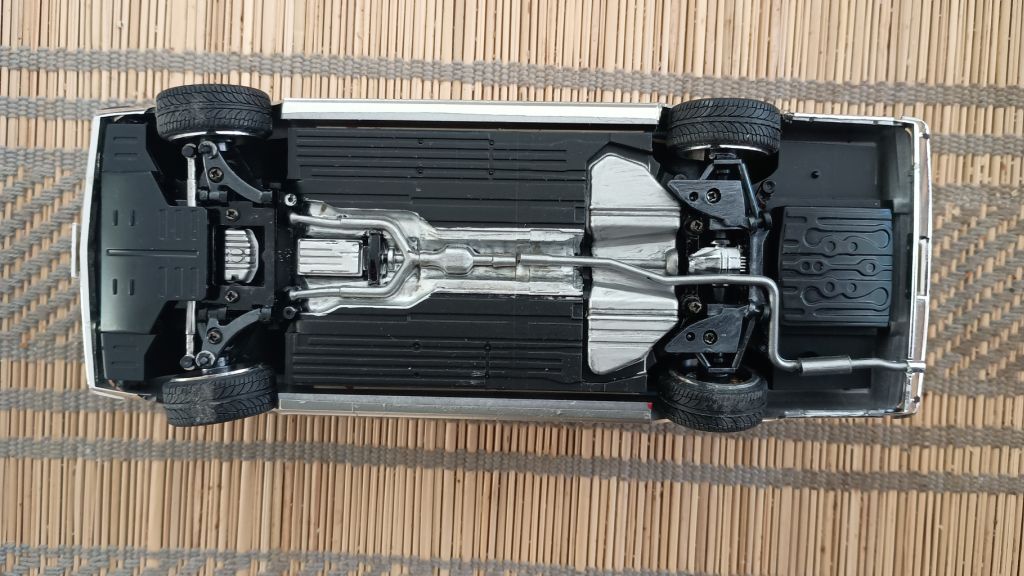
Chassis of the Century
While we’re discussing chassis detail, I must mention that some Aoshima kits come with working suspension with metal springs, held together by tiny screws. These are not a kit for a beginner! The first time I built one – a Toyota Century – I had to really concentrate to study how all the parts went together. This was not Aoshima’s fault – it was something I hadn’t come across before. Added pressure was that I was building it for an overseas friend, so I had to do a perfect job. While I might be inclined to do a ‘near-enough’ job for myself, I wouldn’t do that for Gunther.
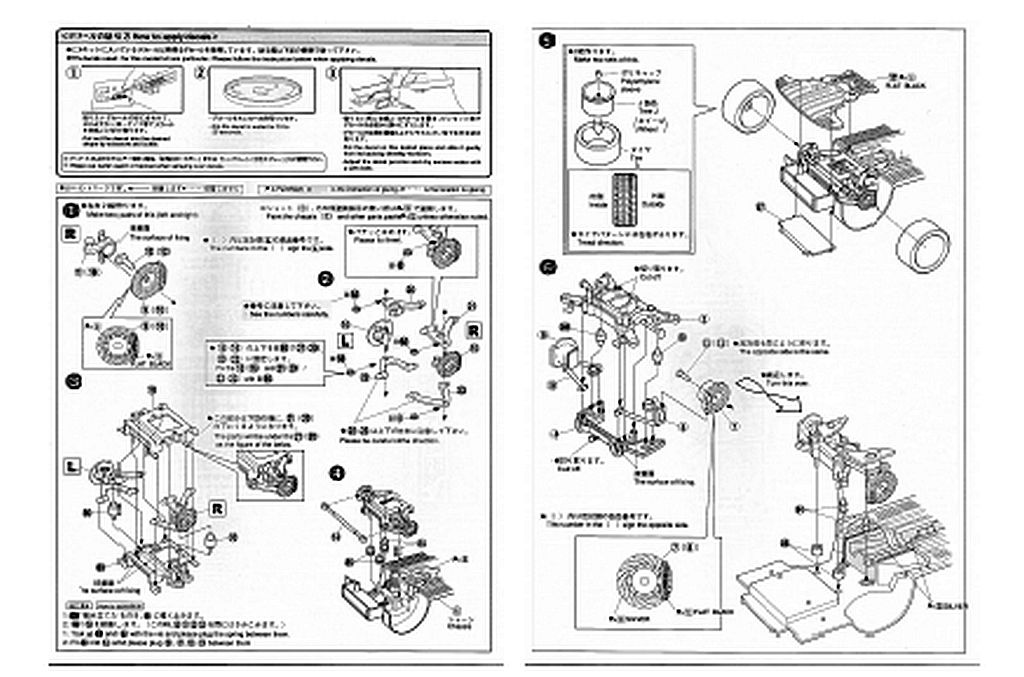
Aoshima Toyota rear end
Then, when the front and rear suspensions were assembled, I had to adjust the height of the model (one screw per wheel), and adjust the camber (another screw per wheel!). Yes, this setup lends itself very well to tuners! You sacrifice some realism for functionality, and the parts are strong enough to withstand prolonged spring compression, so it’s not quite to scale. As far as I know, this system is limited to their big Toyota models (notably later Crown and Century platforms).
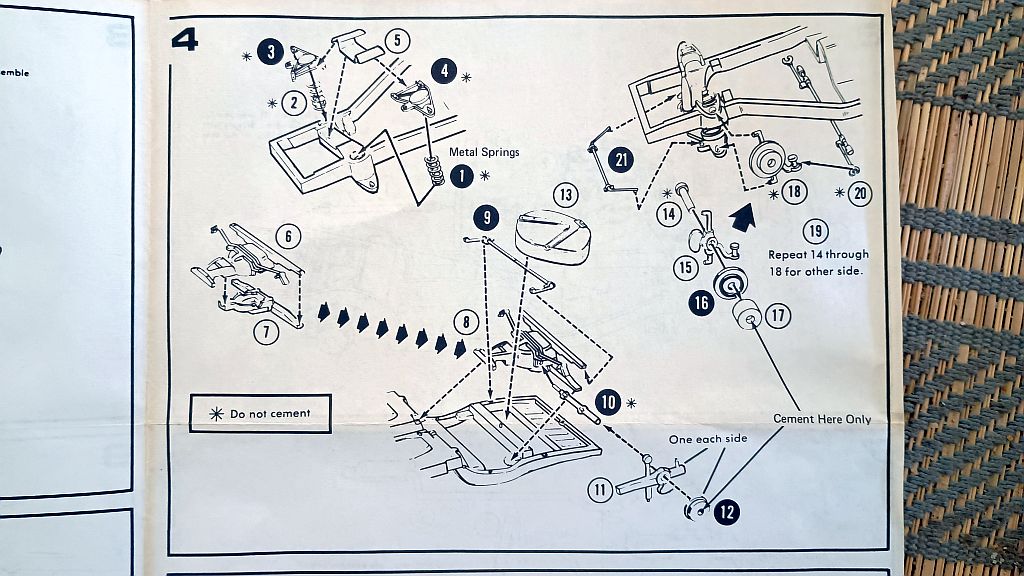
MPC Corvette, here a ‘72
Have US manufacturers done this, you wonder? At the front end, yes, in a simpler form. Back in 1963, MPC brought out a 1960 Corvette with working front suspension, a system they carried over to their C2 Corvettes. Unfortunately MPC’s springs were too weak to support the weight of the front end and engine, and it rode on the bump stops until you picked it up. Stretching the springs a bit to re-tension them just resulted in the front end flying apart as the plastic wasn’t strong enough to contain increased spring forces; not in the initial release anyway.
The other extreme: Fujimi Enthusiast kits
Other kits can be extremely challenging. I’ve written before about the various quality issues which make life difficult for the modeller, and mentioned in passing the Fujimi Enthusiast series kits with their 230-240-odd parts. That’s more than double the norm.
Now, kits with a huge parts count aren’t necessarily the most satisfying to build either. Taking Fujimi’s BMW 6-series kits as an example, you have something like forty parts alone for the engine. More if it’s the Alpina Turbo version.
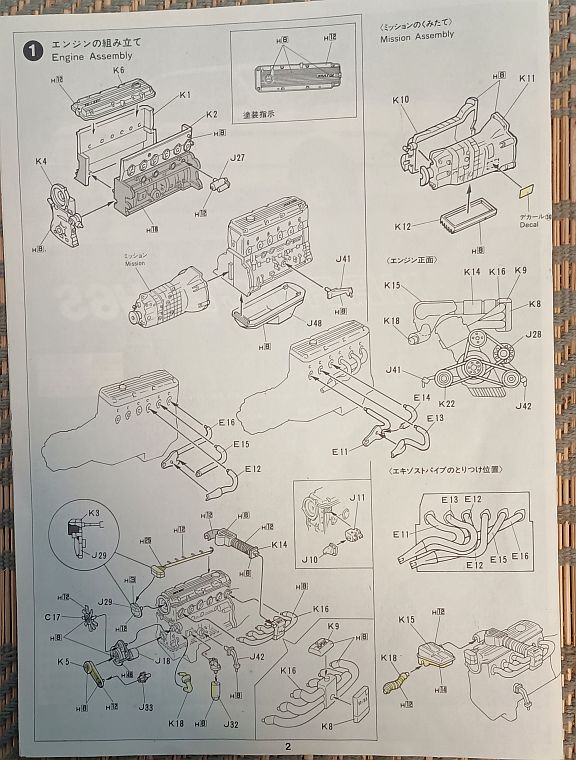
Fujimi BMW engine: have fun!
That’s great from the point of view of detail, but cutting some of those tiny parts off the frames cleanly, handling and attaching them in the precise place can be a right pain. Tweezers are a must of course, a magnifier is advisable, and you may need extra light on the subject. For a small part like an oil filler cap, glue has to go in just the right spot. And whatever you do, don’t sneeze on your work!
Sometimes the parts breakdown can go to ridiculous extremes. My BMW Hartge H6S has seat bases comprised of five separate pieces; four separate sides and a fore/aft adjustment handle.
With the Hartge, there’s the added complication that the parts as drawn in the instructions will not fit the floor as moulded. Contours and mounting holes didn’t match. Time to ask myself some questions: Are the parts I have meant for another version of the kit (there are four)? Is the assembly drawing in error? Were some of the seat base parts moulded incorrectly? Are the mounting holes in the wrong spot? Do I need to remake some parts to a size and shape to fit? They weren’t the only questions…
Eventually I reworked two of the seat base sides for a broader attachment point. And used a fresh tube of super glue, just in case.
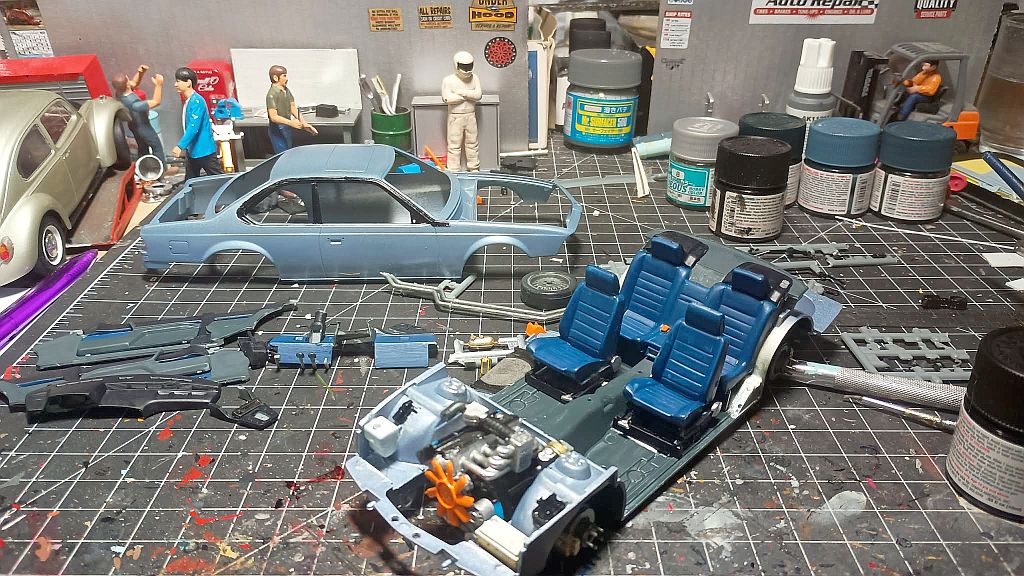
Seats in place at last!
But I wasted so much time trying to sort this out that every time I look at the otherwise-lovely model, I remember the ‘seat time’ – both in terms of time wasted figuring out what was wrong, time taken correcting it, and the time the kit was ‘in limbo’, boxed up again and shelved while I built something easier.
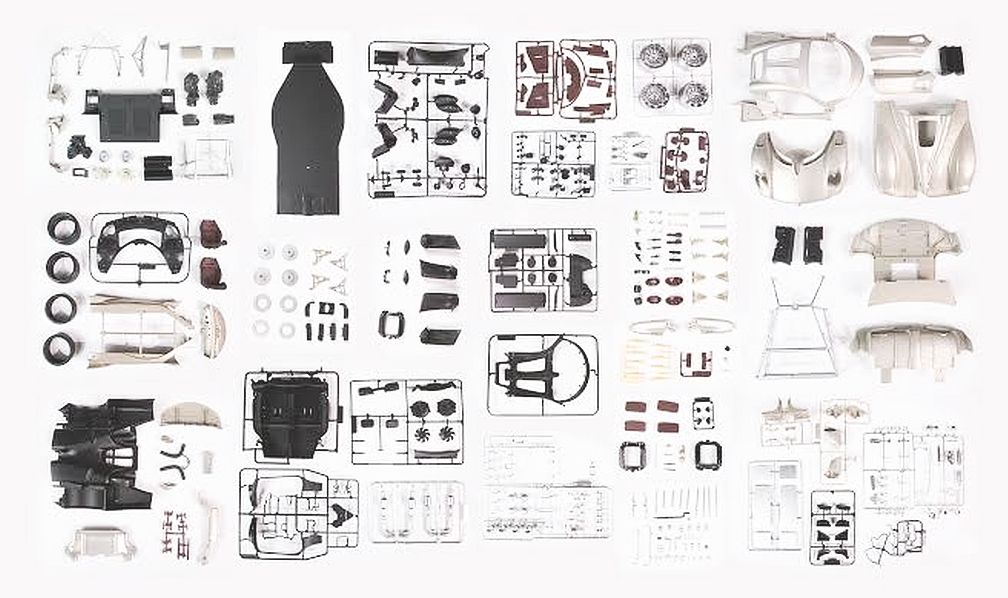
Typical Pocher kit parts, from their FB page.
Are these the hardest kits? No. Some larger scale kits are much harder, and may have double the number of pieces or more. Hardest would probably be the Pocher kits in 1/8 scale – Paganis, Ferraris and a lone Porsche 917, 500-800 parts, operating everything, with prices from £800 to just over £1,000, according to their UK website. Free delivery worldwide, at those prices. Some of their vintage Alfa Romeo and Mercedes kits had about 2,000 parts. Not for me!
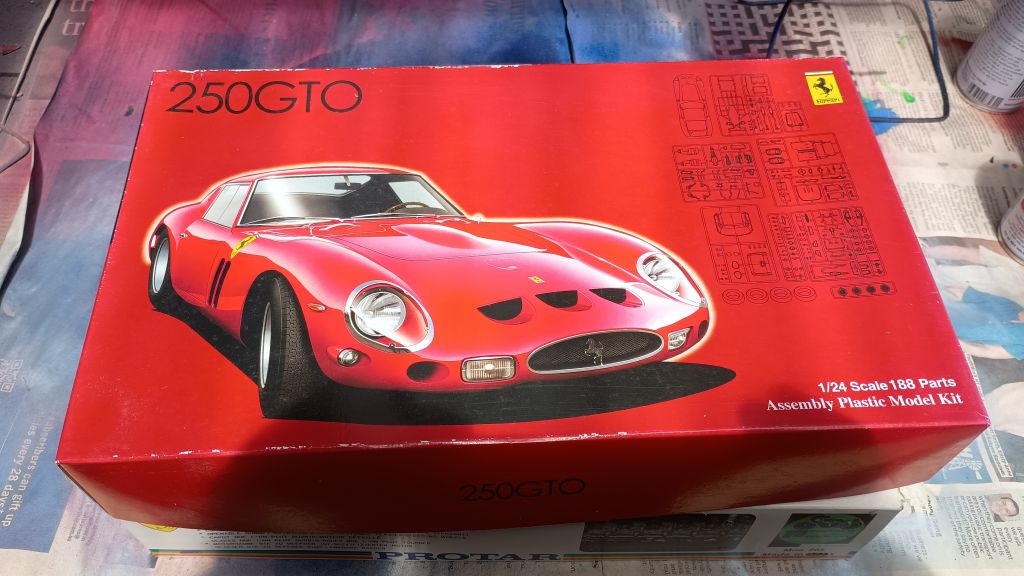
Fujimi’s EM-derived GTO
Most kits these days are relatively free from such problems however. Things have moved on in 41 years since Fujimi introduced the EM-series kits. Some of the Ferraris and Porsches from the EM series are still available, some slightly de-contented. The 250GTO is now catalogued as RS-35.
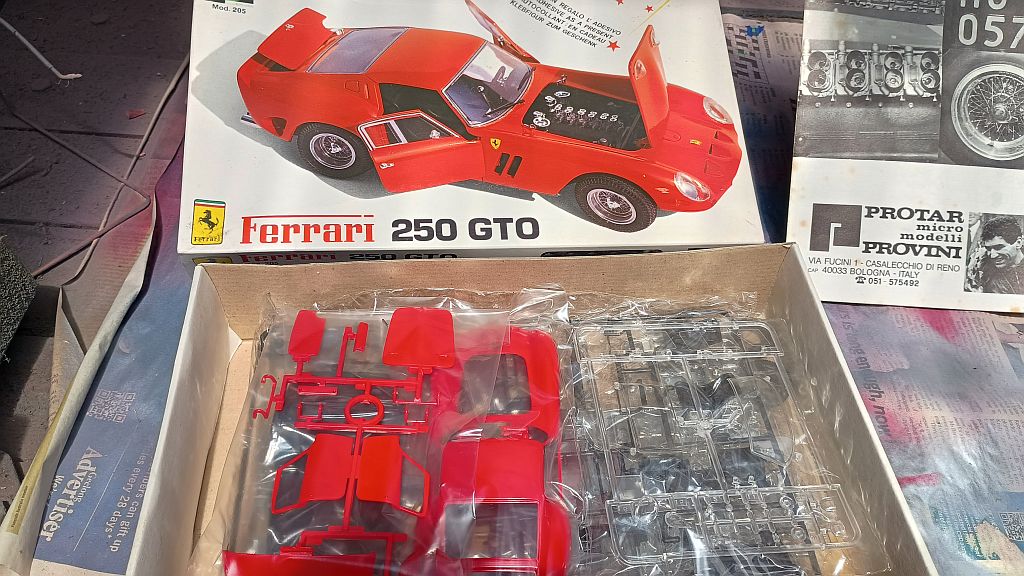
Protar’s GTO from 1979.
Oh, and that Revell 250GTO at the start? Turns out it’s a 2007 rebox of the Italian Protar kit from 1979, last seen in 1983. Two hundred-piece kits are nothing new!






Protar, haven’t seen that name in a long time! They were much appreciated here in Italy back in the day, the company was founded by a Motorbike GP champion; when the company closed, Italeri bought their stampings.
Not that I ever owned one; my skill level is at best a 2 on Revell’s scale.
I have the utmost appreciation of respect of those able (and crazy enough) to build a model engine where a header or a pulley is a unique part, in such a small scale!
Gianluca, I found the Protar GTO on a dusty shelf in a small-town store about fifteen years ago. I think it’s the only Protar car kit I’ve ever seen. I always felt they were more of a motorbike model company that did the occasional car – from what you say that’s not surprising!. It seems they closed in 2003, and some of their car kits were picked up by Revell, some by Italeri – like this Alfa Romeo.
Indeed, I went down a interesting rabbit hole. The pilot was Tarquinio Provini and he started a small company that made models of the bikes on which he ran, apparently in a quite detailed way
I remember some snap kits branded as Snap-Tite – maybe AMT? As kids of 11-12 we considered them as fit for only kindergarteners.
Yes, most of these you feature are far more complex than anything I ever built.
Thanks JPC. Snap-Tite was what Monogram historically called theirs, but the term became rather generic, and I have seen it used on several commercial websites – one claiming to have Snap-tite kits from ten manufacturers. Maybe the copyright ran out?
I drifted away from this world sixty years ago, and you provided me a great catch-up today—-I learned a lot. My patience has increased with maturity, but I’d never be up for the more detailed models today.
I playfully tease younger friends about today’s Lego kits being snap-together……there’s no “commitment” you’d have using the glue and so on. I see there IS an equivalent in today’s model-car world—–that’s good to know.
George, I’ve been building for about sixty years, so I started about the time you drifted away, and it’s amazing the changes in the hobby I’ve seen. But looking ‘from outside’ they must seem huge.
And Lego – that’s changed so much too. I used to help my son build his new sets, but the ones my grandson builds now seem so much more complex. I’m content to look at those from a distance!
As a teen, I built that Revelle Jaguar kit, and yes, it was a bear. Another couple that were difficult were a Hawker Hurricane that had maybe a 20-24″ wingspan (1:25 scale?), as well as an F4 Phantom, also in large scale.
Much more recently, I combined two Moebius kits to replicate the truck I learned to drive on, a ’69 F-100 longbed Custom Cab with the 240 six. The engines in both kits (one had the V8) were fairly detailed.
Ed, I added the mention of that Revell Jaguar at the last minute, but it seems many of us have ‘sub-optimal‘ memories of that kit! There have certainly been large scale plane kits in 1/24 or 1/25; I can only imagine the difficulty trying to find clear space to display them.
I know you showed a photo of the real truck, but have you shown us the model yet?
Another one here who built the Revell XKE, much more challenging than my usual fare of AMT 3-1 kits, which included the 1963 Chevy II station wagon. I also remember building a 1\24 scale Ferrari GTO, definitely not Protar … maybe Monogram?
dman, depending when you built it, that GTO could have been a Monogram kit, or might have been by Aurora. Aurora originally made it, but Monogram got the tooling in 1978. Since you mention the Chevy II wagon, I suspect you had the Aurora – not an easy build!
It was in the 1960’s so I guess it must have been Aurora then. I built Aurora planes but I don’t remember many cars. But I was mostly an AMT and JoHan guy, occasionally MPC. Revell seemed premium,, and more expensive. Plus I liked to share parts between 1/25th scale models and I recall Revell and most of the others except the three mentioned above were 1/24th.
My older brother built the Revell XKE too. I was blown away by it, and I would have totally botched it. I stuck to the cheaper and simpler kits and generally made a mess of them. Modeling was not my thing.
Thank you as always, Peter, for this remarkable small-scale journey you’ve been taking us on. It’s a wonderful addition to CC.
Thank you, Paul. I’m glad for the opportunity to share my interest (obsession?) with a wider audience.
Now that I’ve mentioned that XKE, and so many of us have similar memories if it, maybe I need to get it out and rebuild it.
I haven’t built a car model since I was around 10 years old. Moved onto US Navy carriers and US military aircraft. I am talking the 60’s so all those kits were pretty simple and not heavy into detail. Mainly Revell. I prefer 1/48 for aircraft and 1/350 for carriers. Today with Tamiya and Hasegawa the detail and complexity has been increased. CV-65 by Tamiya costs around $260 retail and has tons of parts even though released long ago. Add photo-etch and the detail soars on this 1 meter long model. Some newer models now include photo-etch. I keep looking at my 1/32 F4 Phantom and F14 Tomcat kits which are quite complicated and large. Yet with cars to work on and cameras to shoot and repair I don’t know if I’ll ever get to them. Probably when the day comes that I am under a car and then can’t get myself back out unless pulled out.
While I was given a few ship and aircraft models before my all-consuming interest in cars became apparent, I never really took to other subjects. Dad was active in WW2; he made 2LT, but rarely spoke of it. Military things just weren’t talked about at home, possibly to avoid upsetting him – the TV news did that enough.
However, I have seen some amazing military models over the years, at shows and in magazines. It’s only been in the last twenty years or so that car guys have taken to checking out the ‘other side’ of the hobby shop and availing ourselves of materials and techniques military builders have been using for decades. In my case that’s weathering materials and paints, though occasionally I’ll add some photo-etch.
Your mentioning that Tamiya CV-65 reminds me I must finish the 1/12 240ZG I started – incredible detail for its age, but one or two surprising omissions.
I built that one! I was thirteen years old and waaaay over my head. You had to put in rubber weatherstripping for the windshield and backlite— with a hot screwdriver! But I kvelled over the perfect taillights with the multi-colored lenses. I’ll never forget the tiny rubber cubes that went inside the universal joints.
Walter, I bought that kit when I was in my late teens. I started building it about fifteen years ago in friendly competition with another builder. But then he started scratchbuilding brand-name JDM hot-up parts for it, while I was messing around with fuel lines and heater hoses. He kind of won by default – maybe I’ll finish it next year…
Peter, a great article, thanks!. I like that you showed the undersides of a couple of the models, something that is not often included but that I find fascinating.
You mention small parts. I have several different types of nippers I use for my HO and N scale train models, and I would be lost without them, especially some of the tiny parts for the Japanese N scale trains I have been modeling for awhile now. Knives just don’t work well enough.
One rather important aspect of model building people often overlook is to read the instructions right through and understand them before starting. Some people like to build in sub-assembly’s and if not careful you could into a bit of a pickle. Case in point: I have a ’96 (I think) release of the Revell BRE Datsun 510, kit 1440 I need to build. The rear suspension is a separate set of 11 parts, with the the main ones being upper and lower sections. It would be easy to build this as a separate assembly with the idea to add later. Until you find out the exhaust system has to be sandwiched between those upper and lower sections. Oops.
Maybe a suggestion for another article would be on decals, the good, the bad and the ugly. On the 510 I think the decals are toast, they have yellowed and look brittle, so am taking inspiration from your models and how you change from a stock build, and am thinking of doing the car up as if it was heading to the paint shop, and not worrying about those decals. And trying to match the red decals to a red paint. White body, baby blue engine compartment and underside (as per photos on line), and black mechanical bits, interior and wheel wells.
As usual looking forward to the next article whatever it might be!
I’ve left replying to you till last because you raise so many issues, Trainman!
Undersides I could show a lot more of, but typically CC doesn’t go under the hood or underneath unless it’s a repair story. Okay, maybe that’s a lame reason. It’s not that I don’t include detail underneath; I detail pretty much everything. It’s more a matter of how many photos I can get away with.
While I have built an HO-scale loco (my son has it for a ‘junkyard’ part of his layout), and have another to build next year, they are static kits. I have seen the N-scale mechs he uses for his narrow-gauge trains (industrial and mining locos, etc.), and have no wish to go that small!
Excellent point about the instructions! Yes, I know that 510, I got given one (for Christmas 1974 IIRC). On occasion I have made the same blunder. We think we know how to build a ‘whatever’ only to find something else has to go under or through it. I built a ’40 Ford coupe this year and thought I could build up the chassis and paint it as a unit. I wound up having to cut the exhaust in half and insert half from each end, then try and join them.
And finally, decals. An article? I’m not sure about that. There is so much variability between manufacturers – what temperature water they need, how long they need in the water, how thin they are, how well they conform to the underlying surface, how they react with setting solutions. And they you have aftermarket decals. I like your idea of a car heading for the paint shop. One of AMT’s diorama accessory sets has a mechanic with a compressor and spray gun – and a decal sheet with a handy assortment of grey primer patches!
I received the XKE when I was too young.
Never completed it.
I think the Airfix planes were 1/24
Interesting kits, in fact.
I have a 1/12 C107 with working suspension. Japanese kit and Could be built US or RoW spec.
Oddly, it has W116 front suspension and not the in wheel W114/8 type.
Ah yes, that C107. Originally an Otaki kit released in 1975, Doyusha got the molds after Otaki shut in 1986. I haven’t built the kit, so wasn’t aware of the discrepancy in the suspension. Sometimes including a working function like that compromises the accuracy – it’s not as though Otaki were constrained by having to use existing tooling.
As an aside, the C107/R107 series of Mercs is available in so many scales – 1/12, 1/24 (Otaki/Arii, Italeri), 1/43 (Heller) and was even made in 1/116 by Sunny – but that was fifty years ago.